Best Vinyl Flooring For Camper

Choosing the Right Type of Flooring for Your RV
First things first, think about your lifestyle and how you’ll be using your RV. Do you have kids or pets? Will you be doing a lot of outdoor activities that could track in dirt and mud? If so, you’ll want a durable and easy-to-clean option, like vinyl or laminate flooring. The best vinyl flooring for camper use is different or many of us.
You need to consider weight. Unless you are stationary and plan to stay that way, weight is a major factor in many things we RVers do.
On the other hand, if you’re looking for something a bit more cozy and comfortable, consider carpet or carpet tiles. They can add a bit of warmth and softness to your RV, but keep in mind that they can be more difficult to clean and may not hold up as well over time.
The nice thing about carpet tiles is they are very DIY and if you spill or ruin a spot you can just drop in another tile.
If you’re going for a rustic or natural look, hardwood flooring might be the way to go. It can give your RV a classic and timeless feel, but be prepared for a higher cost, extra weight, and more maintenance. And if you’re feeling really adventurous, you could even consider installing some unique and eye-catching tile or stone flooring. But again with weight being a factor, you need to choose your flooring wisely,
Ultimately, the right type of flooring for your RV will depend on your personal preferences and needs. So have fun exploring your options and choosing the perfect flooring to make your RV feel like home on the road!
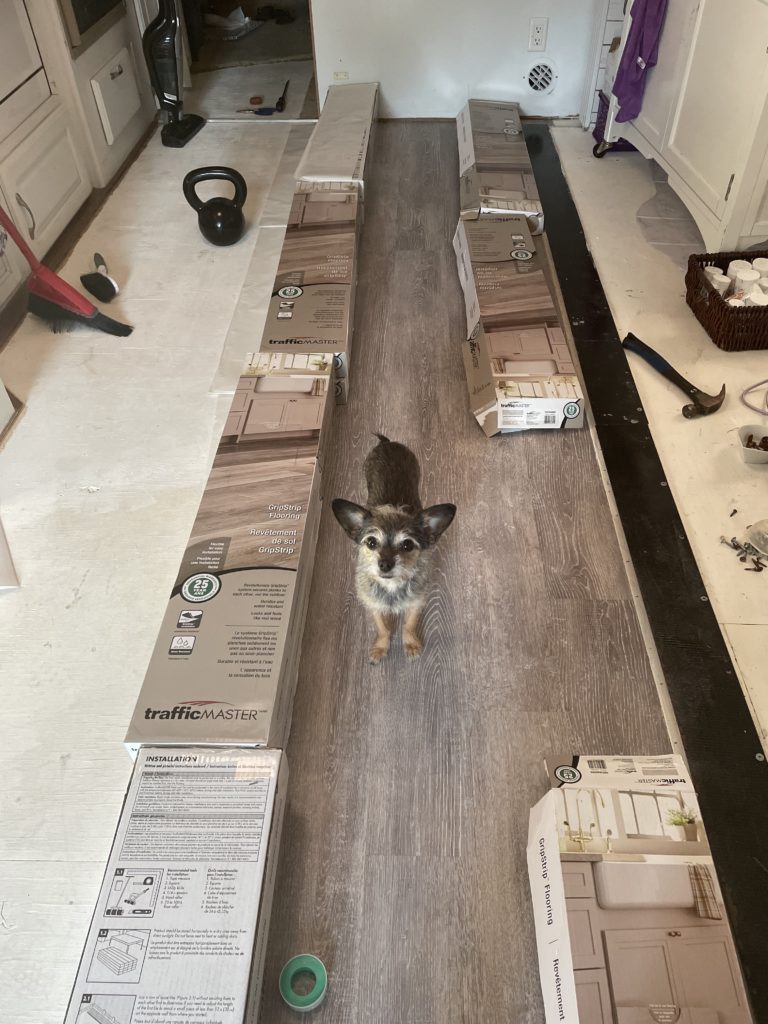
it took me months of research and planning before deciding to go with ‘grip strip’ luxury vinyl plank flooring. Once I made the choice it took me even longer to decide on a colour! I love it now though. No rush right, this RV lifestyle is for LIFE, for me at least.
Why I chose the Grip Strip Vinyl Flooring for my Class A
I wanted something that was little to no prep for me. I wanted something I could do on my own. I wanted something I could repair if the need should arise, and It already did! The cost was a factor as well. I definitely wanted something easy, cheap, and beautiful. The best vinyl flooring for camper or RV is totally subjective.
Planning and Preparation: Before You Begin
Getting organized and having a solid plan in place can make the process much smoother and less stressful. The most important piece of advice I can give you is to buy the right tools for the project before you start the project! Whether you are removing your old flooring, or fixing a leaky toilet( check out our blog post about fixing a leaky toilet valve, you need the right tools, and three trips to the home depot is just annoying when you are elbows deep in your exciting project!
First and foremost, make sure you have all the necessary tools and materials on hand before you begin. This might include things like flooring adhesive, a utility knife, a measuring tape, and any specialized tools required for your particular type of flooring. You’ll also want to have a plan for disposing of the old flooring and any other debris that may be generated during the process.
Next, take the time to thoroughly clean and prepare the existing flooring surface before installing the new flooring. This might involve removing any old adhesive or flooring materials, repairing any damage or defects, and ensuring that the surface is level and free from any debris or dust. You’ll also want to measure and cut your new flooring pieces to ensure a precise fit and minimize waste.
Finally, it’s important to take your time and work carefully as you install the new flooring. Depending on the type of flooring you choose, you may need to apply adhesive or use specialized tools to secure the flooring in place. Follow the manufacturer’s instructions carefully, and be prepared to make adjustments as needed to ensure a smooth and professional-looking finish.
By taking the time to plan and prepare carefully before beginning your RV flooring replacement project, you can save yourself time, money, and stress in the long run. So get organized, take your time, and enjoy the process of creating a beautiful new floor for your home on the road!
Removing the Old Flooring: Step-by-Step Guide
It’s really important not to skim on having the right tools for this project. If your RV had carpet there are a million little staples, and if you don’t get them all out they can damage your new flooring and no one wants that!!!!
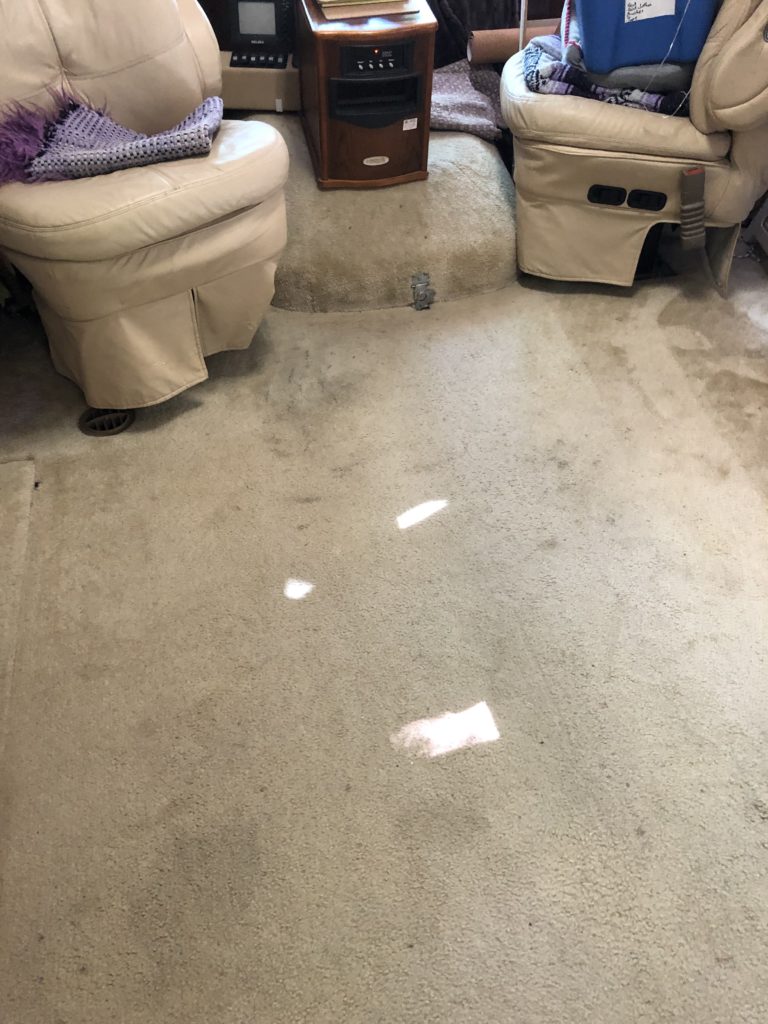
Step 1: Prepare your RV Before you begin, remove any furniture or other items from the RV that may be in the way. You’ll also want to cover any surfaces or furnishings that could be damaged by debris or dust. If removing isn’t possible, what I did was move everything out of my slide pull the carpet out, move everything into the slide, pull the carpet out of the main living space. It was a lot of time and effort and it went a lot more smoothly when I purchased the following items.
Step 2: Remove the old flooring Start by cutting the old flooring into manageable pieces with a utility knife. Depending on the type of flooring, you may be able to pull it up by hand, or you may need to use a pry bar or other tools to remove it. Be sure to work carefully to avoid damaging the subfloor or any other components of the RV.
Step 3: Remove any adhesive or residue once the old flooring is removed, use a scraper or other tool to remove any adhesive or residue left behind. Be sure to work carefully to avoid damaging the subfloor or any other components of the RV.
Step 4: Clean the subfloor After removing the old flooring and adhesive, thoroughly clean the subfloor to remove any dust or debris. You may also want to sand the subfloor to create a smooth, even surface for the new flooring.
Step 5: Check for damage or defects Take the time to inspect the subfloor for any damage or defects that may need to be repaired before installing the new flooring. This might include replacing any rotten or water-damaged wood, or repairing any cracks or holes.
Step 6: Prepare the subfloor for the new flooring Depending on the type of new flooring you’ll be installing, you may need to apply a levelling compound or primer to the subfloor to ensure a smooth, even surface. Follow the manufacturer’s instructions carefully. I painted my subfloor with “Killz” just to give myself some peace of mind. My floor was relatively undamaged. I chose vinyl plank flooring because it didn’t require an underlay of any kind.
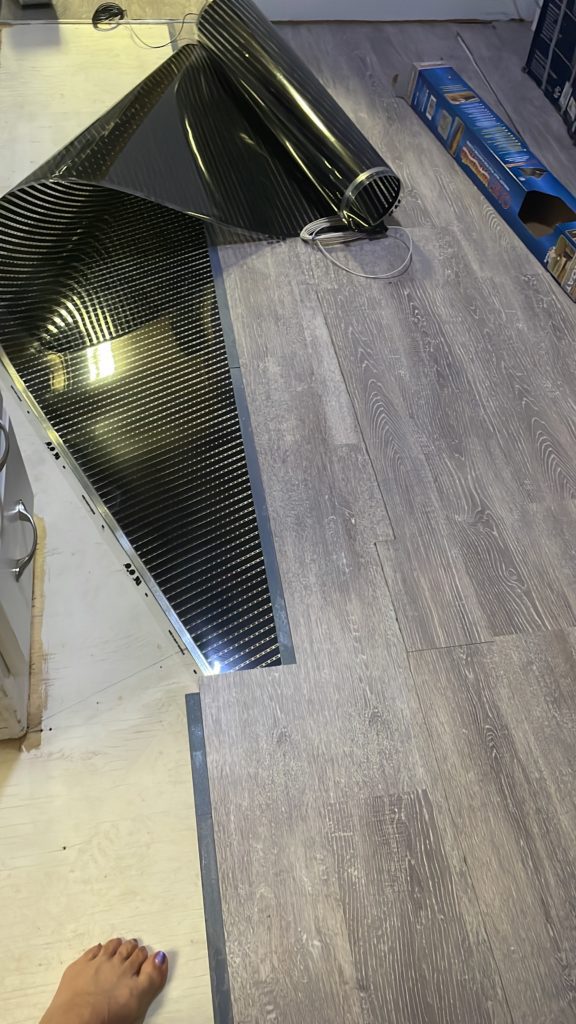
Step 7: If you have the time, patience, and electrical knowledge, now is a good time to decide if you want to do a heated floor underlay. Believe me, all the folks who talk about how cold the floor is when the carpet is gone are not lying. It’s darn cold. I live in Canada and the winter was noticeably colder with the vinyl flooring than before. I bought myself a heated flooring underlay and I’m in love with it!!! My dogs love it too, they used to only walk on the many rugs and carpets I had put down to take away the chill they are much happier now. I’ll do a blog post about it! Stay tuned.
Installing the Best Vinyl Flooring For Camper: Tips and Trick For More than Just Vinyl Flooring
- Choose the right type of flooring: Make sure you choose a flooring material that’s suitable for use in an RV. Consider factors like durability, ease of installation, and maintenance requirements. Many of the products are not suitable for extreme cold or extreme heat. RV’s are much more susceptible to heat fluctuations particularly if they are left vacant during the summer or winter months.
- Measure twice, cut once: Take your time to carefully measure and cut each piece of flooring to ensure a precise fit. This can help minimize waste and ensure a professional-looking finish.
- Start in the middle: When installing the new flooring, it’s generally best to start in the middle of the RV and work your way out. This can help ensure that the flooring is centred and aligned correctly. I personally started in the middle of the slide and worked out to the edge, for the kitchen side of my RV, I think I would have preferred to start with the kitchen edge and met the slide as it’s straight and simple. Finishing with the most challenging part of the process didn’t make me very happy at all and I was so tired I had lost my motivation to do a good job.
- Use the right adhesive: Depending on the type of flooring you choose, you may need to use a specific type of adhesive. Make sure you follow the manufacturer’s instructions carefully to ensure the best possible results.
- Work in sections: Rather than trying to install the entire floor at once, work in small sections to make the process more manageable. This can also help ensure that the adhesive doesn’t dry out before you have a chance to lay the flooring.
- Use a roller: After laying each section of flooring, use a roller to press it firmly into place. This can help ensure that the flooring adheres properly and doesn’t shift or buckle over time.
- Be patient: Installing new flooring in an RV can be a time-consuming process, so be prepared to take your time and work carefully. The end result will be worth it!
Finishing Touches: Trim and Baseboards for Your RV Flooring
Trim in your rv can be a little tricky, there isn’t a lot of space between the bottom of the cupboard and the floor, at least not in my rigs!
When it comes to finishing touches for your RV flooring project, trim and baseboards can make a big difference in the final look and feel of your space. Here are a few things to keep in mind:
- Choose the right trim: There are a variety of trim options available, including quarter-round, T-molding, and stair nose. Choose a trim that complements the style and color of your new flooring, and make sure it’s suitable for use in an RV.
- Measure and cut carefully: Just like with the flooring itself, it’s important to measure and cut each piece of trim carefully to ensure a precise fit. You may need to use a miter saw or other cutting tool to create the correct angles for corners and transitions.
- Install with care: When installing trim, be sure to use the right type of adhesive or fasteners for the material and surface you’re working with. Work slowly and carefully to ensure that the trim is aligned correctly and that any gaps or seams are minimized.
- Choose complementary baseboards: Depending on the layout of your RV, you may also want to install baseboards along the walls to finish off the look of your new flooring. Choose a baseboard material and style that complements your flooring and other decor.
- Paint or stain as desired: If you’re using unfinished trim or baseboards, you may want to paint or stain them to match your existing color scheme. Choose a high-quality paint or stain that’s suitable for use in an RV, and be sure to let it dry completely before installing the trim.
By taking the time to carefully choose and install trim and baseboards, you can give your RV flooring project a polished, professional finish that will help transform the look and feel of your space. Just be sure to work carefully and take your time to ensure the best possible results!
Maintenance and Care: Keeping Your RV Flooring Looking Great
Whatever you choose for your flooring wether it’s th best vinyl flooring for camper or motorhome, or carpet tiles, or peel and stick, maintenance is a very important factor. Choosing your flooring based on care and maintenance could be a pretty important factor.
- Clean regularly: Dirt, dust, and debris can quickly accumulate on your RV flooring, so it’s important to clean it regularly. Use a soft-bristled broom or vacuum with a bare floor setting to remove loose debris, and mop with a gentle cleaner designed for use on your type of flooring.
- Wipe up spills immediately: Accidents happen, but it’s important to clean up spills and stains on your RV flooring as soon as possible. Use a clean, damp cloth to blot up the spill, then dry the area completely to prevent water damage.
- Protect high-traffic areas: Areas that receive heavy foot traffic, such as entryways and around the kitchen and dining areas, are more prone to wear and tear. Consider using area rugs or runners to protect these areas and extend the life of your flooring.
- Avoid harsh chemicals: Harsh chemicals and abrasive cleaners can damage your RV flooring over time. Stick to gentle, non-abrasive cleaners and avoid using bleach, ammonia, or other harsh chemicals.
- Maintain the proper temperature and humidity levels: Extreme temperature and humidity can also damage your RV flooring. Try to maintain a consistent temperature and humidity level in your RV, and consider using a dehumidifier if necessary.
- Inspect for damage regularly: Periodically inspect your RV flooring for signs of damage, such as scratches, cracks, or warping. Address any issues promptly to prevent further damage.
- If you have slides it’s very important to make sure there is no debris of any kind on the floor when you slide your slide in. When I was researching for my floor install many folks said they had to put something down to help the slide roll over the new floor smoothly.
By following these tips and taking care of your RV flooring properly, you can help ensure that it looks great for years to come. And, as always, be sure to follow the manufacturer’s instructions for care and maintenance to ensure the best possible results.
DIY vs. Hiring a Professional: Which Is Right for You?
I did my peel and stick vinyl plank flooring completely on my own. I was 46 at the time. it wasn’t easy, but it wasn’t that hard, there are things I would do differently now, but the experience is gained from actually doing the project. I think I would have started at the cupboard area, it’s not flat by any means, nooks cranny, annoying bits to cut around that I think would have been easier to deal with if not trying to fit it in to the existing flooring i had already laid out.
When it comes to any home improvement project, one of the biggest decisions you’ll need to make is whether to tackle it yourself or hire a professional. This is certainly true when it comes to replacing the flooring in your RV. Here are a few things to consider when deciding whether to DIY or hire a pro:
DIY:
- Cost savings: One of the biggest advantages of DIY is cost savings. By doing the work yourself, you can save money on labor costs and potentially get better deals on materials.
- Control over the project: Another benefit of DIY is that you have complete control over the project. You can choose the exact type and style of flooring you want, and you can work at your own pace and on your own schedule.
- Sense of accomplishment: Finally, there’s the sense of accomplishment that comes with completing a DIY project. There’s something satisfying about being able to say you did the work yourself and seeing the finished product knowing you put your own effort and skills into it.
However, there are also some downsides to DIY:
- Lack of experience: If you don’t have experience with flooring installation, you may run into issues or make mistakes that could end up costing you more in the long run.
- Time and effort: DIY projects can be time-consuming and require a lot of effort. Depending on the size of your RV and the complexity of the project, you may need to invest a significant amount of time and energy to get the job done.
- Risk of mistakes: Mistakes can be costly and time-consuming to fix, and could even damage your RV. Be sure to do your research and follow proper installation procedures to minimize the risk of mistakes.
Hiring a Professional:
- Expertise and experience: One of the biggest advantages of hiring a professional is their expertise and experience. A skilled flooring installer will have the knowledge and tools needed to do the job efficiently and effectively, and will be able to handle any issues that arise.
- Time savings: Another benefit of hiring a professional is time savings. They will be able to complete the job much more quickly than you could on your own, freeing up your time for other activities.
- Professional finish: Finally, a professional installation will typically result in a more polished and professional finish. This can be especially important if you’re looking to sell your RV in the future or want to impress guests.
Of course, there are also some downsides to hiring a professional:
- Cost: The biggest drawback of hiring a professional is cost. Labor and materials can be expensive, so be sure to get multiple quotes and do your research to find a reputable installer at a reasonable price.
- Lack of control: When you hire a professional, you may not have as much control over the project as you would if you were doing it yourself. Be sure to communicate clearly with the installer to ensure that your vision for the project is understood and respected.
- Scheduling: Finally, you’ll need to work with the installer’s schedule when setting up the project. This can be challenging if you have a tight timeline or other commitments.
In the end, the decision to DIY or hire a professional will depend on your budget, experience, and priorities. Be sure to weigh the pros and cons carefully before making your decision, and don’t be afraid to seek out advice or help from experts in the field. With the right approach, you can achieve great results no matter which path you choose!
Budgeting for Your RV Flooring Replacement
Budgeting for an RV flooring replacement is an important step to ensure you’re able to complete the project within your means. Here are some tips for budgeting for your RV flooring replacement:
- Determine the scope of the project: Before you can start budgeting, you need to determine the scope of your project. This includes the size of your RV, the type of flooring you want to install, and any additional materials you’ll need (e.g. underlayment, adhesives, trim).
- Research costs: Do some research to get an idea of the costs associated with your project. Look up the cost of materials and get quotes from flooring installers if you plan to hire a professional. Be sure to factor in any other expenses, such as tools or equipment rentals, that you may need.
- Set a budget: Once you have a good idea of the costs, set a budget for your project. Be realistic about what you can afford and consider setting aside a contingency fund in case unexpected expenses arise.
- Consider financing options: If you don’t have the funds to pay for your project upfront, consider financing options. This could include using a credit card with a 0% APR introductory period, taking out a personal loan, or financing through the flooring supplier or installer.
- Prioritize your expenses: If you’re on a tight budget, consider prioritizing your expenses. Focus on the most important areas first (e.g. high-traffic areas) and plan to upgrade other areas later when you have more funds available.
- Do-it-yourself vs. professional installation: Finally, consider whether you’ll be doing the installation yourself or hiring a professional. If you have the skills and experience to do it yourself, you’ll be able to save money on labor costs. However, if you’re not comfortable with the installation process, it may be worth investing in a professional to ensure the job is done correctly.
By following these tips, you can create a realistic budget for your RV flooring replacement and ensure that the project is completed within your means. Remember, it’s important to stay within your budget and avoid overspending to prevent any financial strain.
Common Mistakes to Avoid When Replacing RV Flooring
Here are some common mistakes that people make when replacing their RV flooring:
- Not properly preparing the subfloor: One of the most important steps in replacing RV flooring is properly preparing the subfloor. If the subfloor is not cleaned, leveled, and repaired as needed, it can cause problems with the new flooring installation, such as uneven or squeaky floors.
- Not measuring and cutting the new flooring correctly: Measuring and cutting the new flooring is a critical step in ensuring a proper fit and avoiding gaps or overlaps. Careful attention should be paid to ensure that the flooring is cut precisely and to the correct size.
- Not allowing the new flooring to acclimate: Different types of flooring materials may require a certain amount of time to acclimate to the RV’s environment before installation. Failure to allow for proper acclimation can cause the flooring to buckle, warp or shift once it’s installed.
- Not using the correct adhesive or installation method: Each type of flooring material has a recommended adhesive or installation method. It’s important to follow the manufacturer’s instructions carefully to ensure proper installation and avoid damage to the new flooring.
- Not properly sealing the edges: Edges and seams of the new flooring should be properly sealed to prevent moisture and debris from seeping underneath. Neglecting to properly seal the edges can lead to mold, mildew, and other problems.
- Not properly finishing the installation: After the new flooring is installed, it’s important to properly finish the job by installing new baseboards, transitions, and other finishing materials. Neglecting to properly finish the installation can leave unsightly gaps and uneven edges, and can even cause damage to the new flooring.
FAQ
- What types of flooring materials can I use for my RV? There are several options for RV flooring, including vinyl, laminate, hardwood, tile, and carpet. Each has its pros and cons, so it’s important to consider factors like durability, moisture resistance, and ease of installation before choosing a material.
- How do I prepare the subfloor before installing new flooring? The subfloor should be cleaned and leveled before installing new flooring. Any old adhesive or debris should be removed, and the subfloor should be inspected for any damage or soft spots.
- Can I install new flooring over the existing flooring? It’s generally not recommended to install new flooring over the existing flooring in an RV. Doing so can add extra weight to the vehicle and may cause issues with clearance or height. It’s best to remove the old flooring and start with a clean slate.
- How do I remove the old flooring? Removing the old flooring will depend on the material and how it was installed. For example, carpet may be pulled up and cut into manageable pieces, while vinyl or laminate may need to be pried up with a pry bar. It’s important to take precautions to protect yourself from dust and debris during the removal process.
- Can I install new flooring myself, or should I hire a professional? The answer to this question will depend on your level of DIY skills and experience. Installing new flooring in an RV can be a challenging task, especially if you’re working with a small space or complicated layout. If you’re not confident in your ability to complete the project on your own, it may be best to hire a professional.
- How long does it take to replace the flooring in an RV? The time it takes to replace the flooring in an RV will depend on the size of the vehicle and the complexity of the project. Generally, it can take anywhere from a few days to a week or more to complete the job.
- How do I maintain my new RV flooring? To keep your new flooring looking its best, it’s important to follow the manufacturer’s recommendations for cleaning and maintenance. This may include regular vacuuming, sweeping, or mopping, as well as using appropriate cleaning products and avoiding harsh chemicals or abrasive tools.
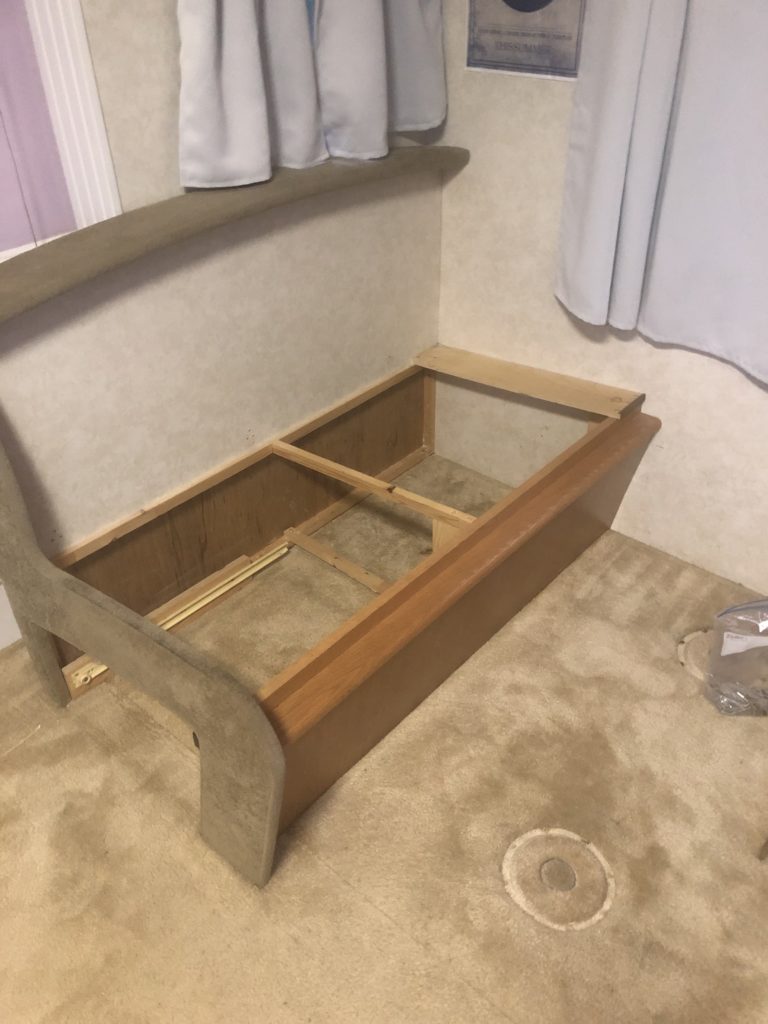
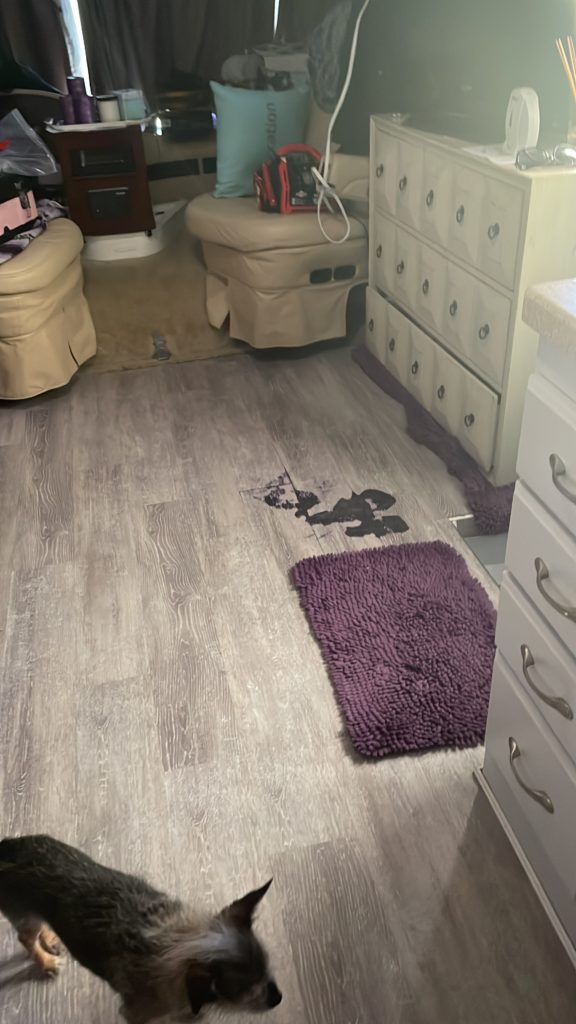
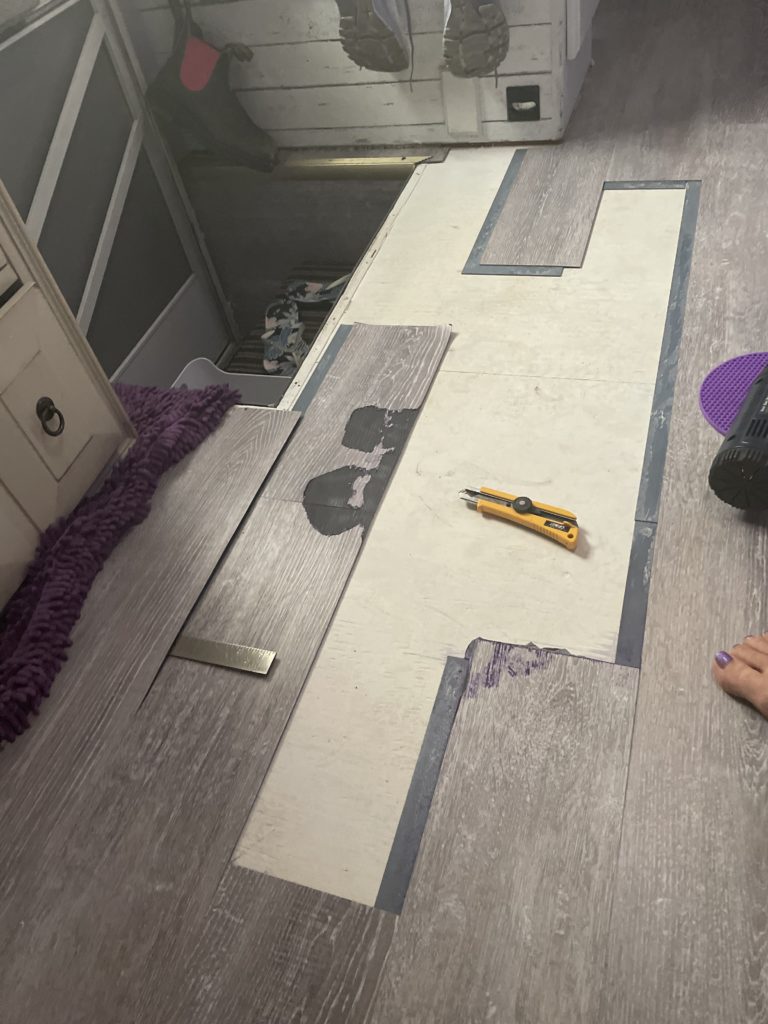
Gallery of Photos of My Flooring Replacement

The Best Tools for Replacing RV Flooring – With Easy Amazon Links
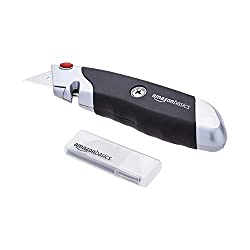
Utility Knife or Carpet Knife: You’ll need a sharp knife to cut the carpet or old flooring into manageable pieces for removal.


Pry Bar: You’ll need a pry bar to help lift up the old carpet or flooring.

Painters Tool: I have found this really handy for my flooring repair project and many other projects around the RV

Staple Remover and Puller: This is the tool kit I waited to buy! Don’t wait, but this before you start pulling your old flooring out!!!

Pliers: You WILL need pliers to remove staples or other fasteners that are holding the carpet or flooring in place. The angled style are also very helpful.


Hammer: A hammer may be useful to help pry up stubborn sections of carpet or flooring.

Vacuum: A vacuum will be helpful to clean up any debris or dust that is left behind after removing the old flooring. I prefer this little wet/dry shop vac, it’s always handy and keeps me from ruining my household vacuum.

Gloves: You will want to wear gloves to protect your hands while removing the old flooring. My hands were covered in little cuts from pulling the million staples.

Safety Glasses: It’s always a good idea to wear safety glasses to protect your eyes from flying debris. There is a lot of dust and crumbs living in those old carpets! safety first friends. Safety first

Knee Pads: If you’re working on your knees for an extended period of time, knee pads can help protect your knees from discomfort or injury. If you were looking for something to do with your old yoga mat, here’s your upcycle!

Respirator Mask: If the old flooring is particularly dusty or contains mold, a respirator mask can help protect you from breathing in harmful particles. If you have an N95 mask lying around that will also help!

Brad Nailer: When you install your trim you are probably going to need one of these. I like the 18v series of power tools from Ryobi. Cordless is always best in my life.

Replacing your flooring is no easy task, particularly if you are living in the RV full time, or if you’re a solo female! If I can do it, anyone can. I’m really happy with the flooring I chose. I was was really concerned about the transition piece between my slide and my main floor, but two years later and I’m still just fine with how that part turned out. I literally just screwed down a long strip of the floor, it is a raised transition and I totally don’t hate it. Pictures below.
The hardest part about installing vinyl plank flooring in motorhomes and campers is the carpet removal and the edge cutouts. Honestly though, with a little patience and elbow grease, anyone can do this project. It is the best upgrade I have done and I’ve done a few. Please chime in with your experiences below. Please like and share. Please note I amnot a


