RV Electrical System 101: Understanding the Basics
Introduction
One of the main reasons RVers camp and live in RVs is because it gives us many of the creature comforts of home. Running water, power, and protection from the elements. These are the basic expectations from any RV.
Understanding your RV electrical system is crucial for any RV owner. RV electrical systems can be complex, with a variety of components that work together give your RV power and provide you with all the comforts of home. Whether you’re a seasoned RV owner or a beginner, it’s important to have a basic understanding of how your campers electrical systems work, how it’s wired, and how to properly care for and maintain it.
A typical RV electrical system includes 12-volt DC power, 120-Volt AC system, and chassis power. These systems work together to power your RV’s lights, appliances, and other electrical equipment. Additionally, RVs are wired differently than traditional homes, so it’s important to understand the basics of RV wiring. Beginners should also be familiar with RV batteries, shore power, generators, solar and wind power, and other components that make up an RV electrical system. Proper care and maintenance of your RV’s electrical components is also crucial to ensure they function properly and safely. RV owners should also be aware of electrical system safety and basic troubleshooting techniques to identify and resolve any issues that may arise.
One important component of RV electrical systems is the ground fault circuit interrupter (GFCI). This device is designed to protect you from electrical shock by shutting off power to the circuit when it detects a ground fault. Understanding how to test and reset your GFCI is an important part of RV electrical safety. By having a basic understanding of your RV electrical system and following proper care and maintenance procedures, you can ensure that your RV is safe and functional for all your adventures on the road.
What Electrical Systems Are in a Typical RV?
A typical RV has three main electrical systems:
- DC Power: This system provides power to the RV’s lights, water pump, vent fans and other low-voltage devices. It is powered by a battery that is charged by the RV’s engine or an external power source. Most RVs overhead lights are powered by the 12volt DC system
- AC Power: This system provides power to the RV’s air conditioning, microwave, and other high-voltage devices. It is powered by an external “shore power” source, such as a campground electrical hookup or a generator. The AC power is what supplies your electrical outlets. Most RVs use either a 30 or 50 Amp power source from an external power supply or a generator.
- Chassis Power: This system provides power to the RV’s engine, transmission, and other vehicle components. It is powered by the RV’s engine battery.
How Are RVs Wired?
RVs or recreational vehicles require electrical power to run various appliances and systems, such as lights, air conditioners, refrigerators, and water heaters. The electrical system in an RV is designed to provide power to both AC and DC appliances and systems.
AC or alternating current power is typically used for high-voltage devices such as air conditioners, microwaves, and other appliances that require a lot of power to operate. AC power is supplied to the RV from an external power source, such as a campsite power pedestal, or from an onboard generator.
On the other hand, DC or direct current power is used for low-voltage devices such as lights, fans, and water pumps. DC power is typically supplied by the RV’s battery or batteries. The battery is charged by either an external power source or an onboard charging system, such as a solar panel or a converter that converts AC power to DC power.
The wiring in an RV is usually installed behind the walls and ceiling to protect it from damage and to keep it out of sight. The wiring is also protected by fuses and circuit breakers to prevent overloading and potential fire hazards.
In summary, RVs use a combination of AC and DC wiring to power different devices and systems. AC power is used for high-voltage appliances, and DC power is used for low-voltage devices. The wiring is typically installed behind the walls and ceiling and is protected by fuses and circuit breakers.
Helpful RV Electrical Basics for Beginners
For beginners, it’s important to understand the different types of power being used in RV electrical systems, including:
- RV batteries: RVs typically have two types of batteries: engine/chassis batteries and house batteries. House batteries provide power to the RV’s 12 volt DC system.
- Shore power: This is an external power source that can be used to power the RV’s AC system.
- Generators: RVs can be equipped with generators that provide AC power when an external power source is not available.
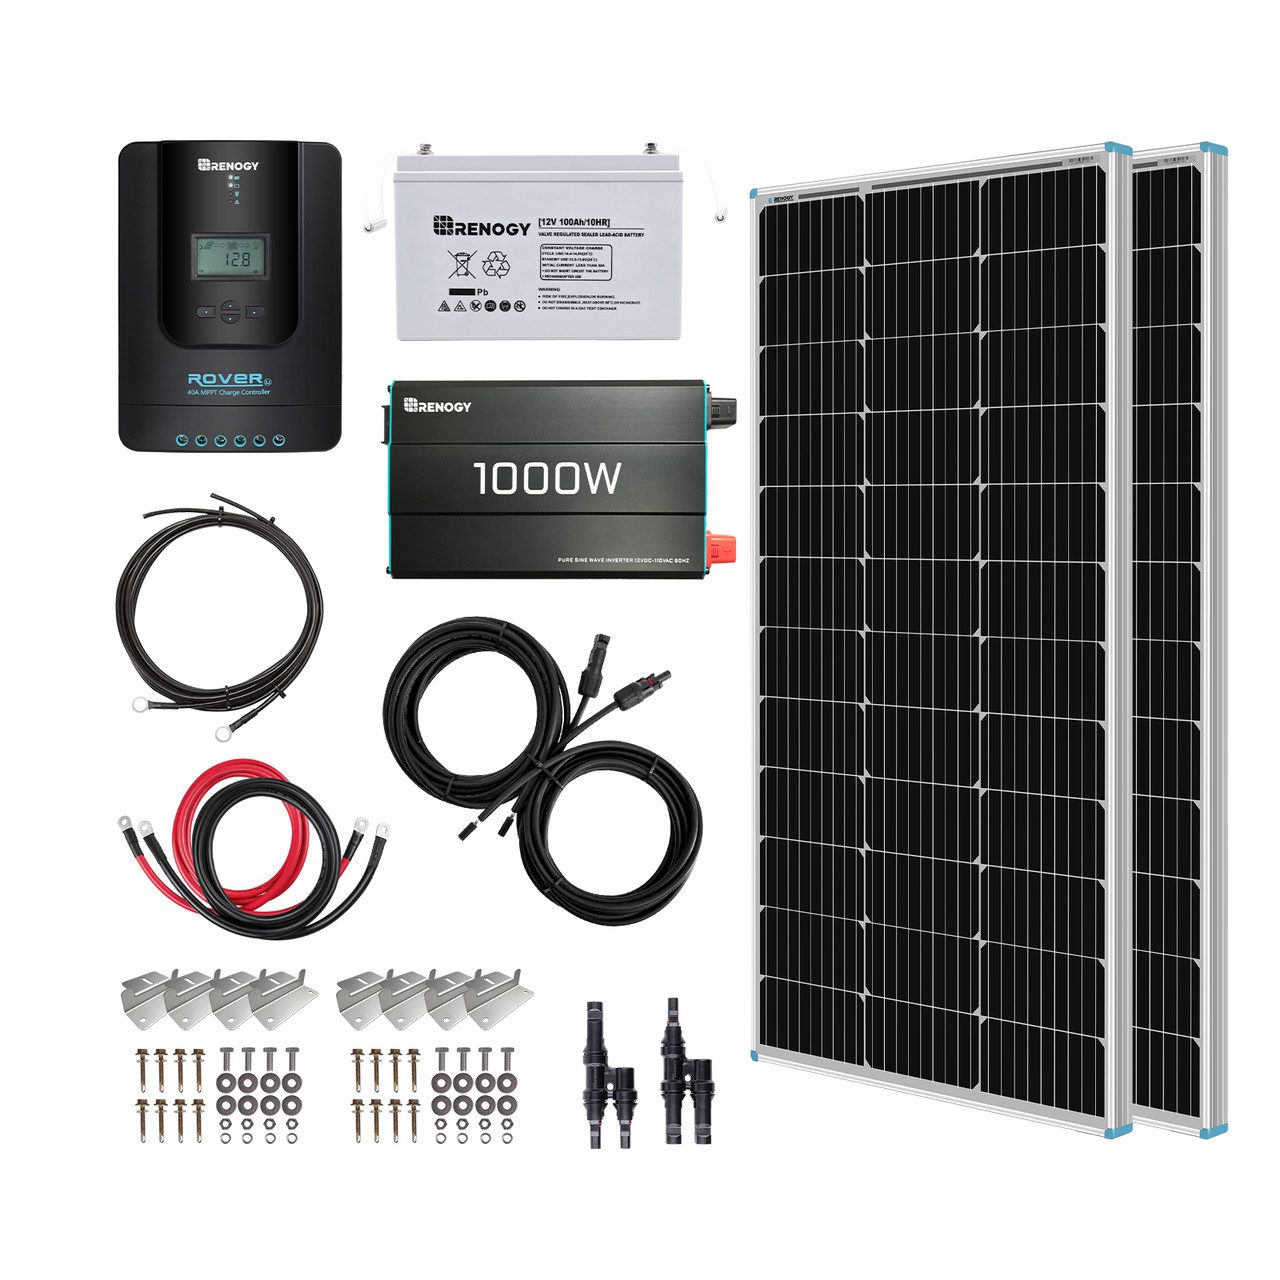
- Solar: Some RVs are equipped with solar panels that can provide power to the RV’s DC system.
Here is the exact system I had installed in my Pleasureway Class B RV. Check the current price at Renogy by clicking here.
Inverters and Converters: What’s the Difference and Essential Function of Each?
Inverter
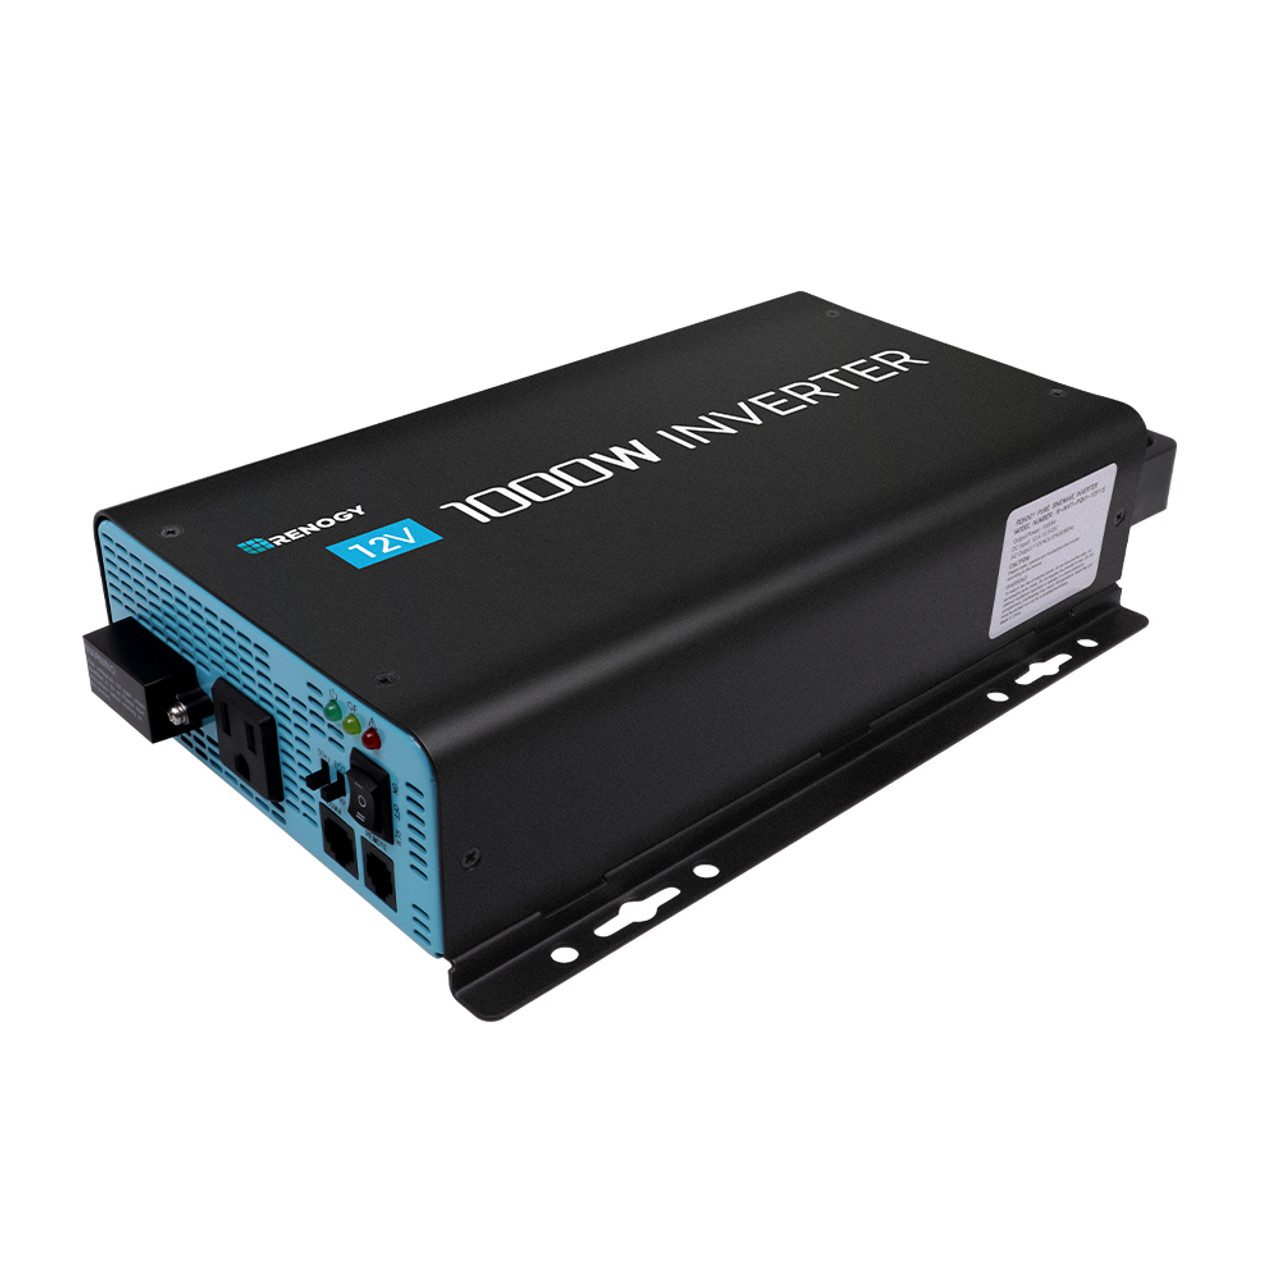
An inverter can be used to power your electrical outlets is a common method for using solar and battery power in an RV. An inverter is an electronic device that converts DC power from your RV’s battery bank into AC power that can be used to power your electrical outlets and appliances.
When using solar power and battery power in your RV, an inverter can be used to convert the DC power from your battery bank into AC power that can be used to power your electrical outlets and appliances. This allows you to use your RV’s electrical system without relying on a generator or plugging into an external power source.
When selecting an inverter for your RV, it’s important to choose one that is compatible with your battery bank and electrical system. Inverters are available in various sizes and power ratings, so be sure to choose one that can handle the amount of power you plan to use.
In addition, it’s important to properly size your battery bank to ensure that you have enough power to run your appliances and devices. This will help prevent your battery bank from being depleted too quickly and ensure that you have power when you need it.
Using an inverter to power your electrical outlets when using solar and battery power in an RV can be a convenient and cost-effective way to power your appliances and devices without relying on external power sources. Just be sure to choose the right inverter for your system and properly size your battery bank for your power needs.
Converter
The function of a converter in an RV is to convert 120-volt AC power from an external source, such as campground electricity or a generator, into 12-volt DC power that can be used to charge the RV’s battery and power its DC electrical system.
The converter typically includes a battery charger that can charge the RV’s battery bank when the RV is connected to an external power source. It also provides a steady supply of 12-volt DC power to the RV’s electrical system, which is used to power lights, fans, pumps, and other low-voltage devices.
In addition, many converters also include a built-in circuit breaker and fuse system to protect the RV’s electrical system from overloading and short circuits.
A converter is an essential component of an RV’s electrical system, as it allows the RV to be powered by an external source when available, while also charging the battery bank and providing a steady supply of DC power to the RV’s electrical system.
Proper Care and Maintenance of Electrical Components
Proper care and maintenance of RV electrical system components is essential to ensure their longevity and prevent issues. This includes:
- Regularly checking and cleaning battery terminals
- Inspecting wiring for damage or wear
- Keeping electrical components dry and free from moisture
- Inspect and clean plugs on all cords 30-amp power cord, 50-amp power cord, and 110
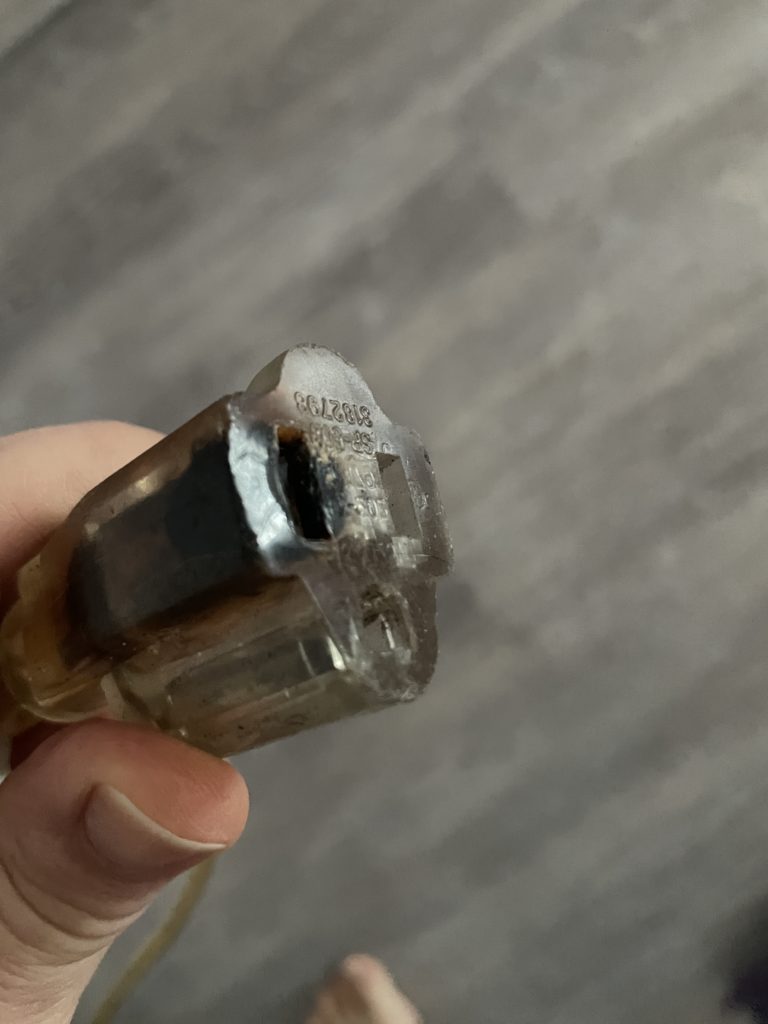
Don’t let this happen to your cord!
RV Batteries
The proper care and maintenance of RV batteries are essential to ensure their longevity and optimal performance. Battery power is what supplies your RVs 12 volt DC system.
RV batteries should be checked and cleaned regularly to ensure that the terminals are free of corrosion and dirt. Batteries should also be kept charged at all times. This can be accomplished by either running the RV’s generator or plugging into an external power source like a campground hookup.
Understanding the maximum capacity of an RV battery is important for ensuring that you have enough power to meet your needs while on the road. The maximum capacity of an RV battery is typically measured in amp-hours (Ah), which represents the amount of current that the battery can provide over a period of time.
The maximum capacity of an RV battery will depend on several factors, including the type and size of the battery, the number of batteries in your RV, and the electrical devices you plan to use. For example, a single deep-cycle battery might have a maximum capacity of around 100 Ah, while a larger bank of batteries might have a maximum capacity of several hundred Ah.
It’s important to note that the maximum capacity of an RV battery is not the same as its actual capacity. The actual capacity of a battery will depend on several factors, including its age, temperature, and how deeply it is discharged. Over time, a battery’s actual capacity can degrade, which means that it may not be able to provide as much power as it did when it was new.
To ensure that you have enough power to meet your needs, it’s important to choose a battery with a sufficient maximum capacity, and to use it in a way that maximizes its actual capacity. This might involve using energy-efficient appliances, avoiding deep discharge cycles, and properly maintaining and charging your battery.
Understanding the maximum capacity of your RV battery is an important aspect of RV electrical system management. By choosing the right battery and using it properly, you can ensure that you have enough power to meet your needs while on the road.
AGM and lead acid batteries can be a little tempermental when itcomes to charging and depleting:
- Over Charging: Overcharging an AGM or lead acid battery can cause it to heat up and lose capacity over time. To avoid overcharging, make sure to use a charger specifically designed for your battery type, and do not leave the battery on charge for longer than necessary.
- Monitoring Voltage: To prevent overcharging, monitor the voltage of your battery regularly using a voltmeter. A fully charged AGM battery should read around 12.8 volts, while a lead acid battery should read around 12.6 volts.
- Over Depleting: Over depleting an AGM or lead acid battery can also cause damage and reduce its overall lifespan. To avoid over depleting, keep an eye on the battery’s charge level and do not let it drop below 50% if possible.
- Proper Charging: When charging an AGM or lead acid battery, use a charger that is specifically designed for your battery type and follow the manufacturer’s recommended charging procedures. For example, AGM batteries typically require a specific charging algorithm that differs from lead acid batteries.
- Storing Batteries: If you plan to store your AGM or lead acid battery for an extended period of time, make sure to charge it fully before storing it and monitor its charge level periodically. Also, store the battery in a cool, dry place away from direct sunlight.
It’s very important to take proper care of your AGM or lead acid battery by avoiding overcharging and over depleting can significantly extend its lifespan and ensure that it performs reliably when you need it. Remember to use the proper charger and monitoring tools, and follow the manufacturer’s recommended procedures to keep your battery in top condition. This is one of the main reasons I decided to switch to lithium batteries in my campervan. I do a lot of boondocking in my van and before installing solar power I seemed to always be running my AGM battery down below 50% and that ultimately lead to its slow demise. Battery power is essential to anyone boondocking in their RV.
Here are some tips on how to care for and maintain non lithium RV batteries:
- Choose the right type of battery: RVs typically use deep-cycle batteries that are designed to provide continuous power over an extended period. There are two types of deep-cycle batteries commonly used in RVs: flooded lead-acid batteries and sealed AGM (Absorbent Glass Mat) batteries. AGM batteries are typically more expensive but require less maintenance.
- Check the battery water level: If you have flooded lead-acid batteries, check the water level regularly and top up the cells with distilled water if necessary. Make sure the plates are always submerged in water to prevent damage.
- Keep the batteries clean and dry: Regularly clean the battery terminals and cables with a wire brush and apply a corrosion inhibitor to prevent corrosion. Keep the battery compartment dry and well-ventilated to prevent moisture build-up.
- Charge the batteries properly: It’s essential to charge the batteries properly to maintain their optimal performance. Use a smart charger that automatically adjusts the charge rate and voltage according to the battery’s needs. Avoid overcharging the batteries, as this can damage them.
- Store the batteries properly: If you’re storing your RV for an extended period, make sure to disconnect the batteries and store them in a cool, dry place. You can use a battery tender or maintainer to keep the batteries charged and in good condition.
In terms of battery types, as mentioned earlier, RVs typically use deep-cycle batteries. The most common types of deep-cycle batteries used in RVs are lead-acid batteries and AGM batteries. Lead-acid batteries are less expensive but require more maintenance, while AGM batteries are more expensive but require less maintenance and have a longer lifespan.
Lithium Batteries for RV Use
Lithium batteries are becoming increasingly popular in RV use because of their numerous benefits over traditional lead-acid batteries. Here are some reasons why lithium batteries are good source of 12-volt system power for RV use:
- High energy density: Lithium batteries have a higher energy density than lead-acid batteries, meaning they can store more energy in a smaller and lighter package. This makes them ideal for RV use, where weight and space are often at a premium.
- Longer lifespan: Lithium batteries have a longer lifespan than lead-acid batteries. They can typically last up to 10 years or more, compared to 3-5 years for lead-acid batteries. This means you’ll need to replace your batteries less frequently, saving you money in the long run.
- Faster charging: Lithium batteries can be charged faster than lead-acid batteries, which is especially useful when you’re on the road and need to recharge your batteries quickly. Lithium batteries can also accept a higher charging current, meaning you can recharge them more quickly using a generator or solar panels.
- More efficient: Lithium batteries are more efficient than lead-acid batteries, meaning they can deliver more power with less energy loss. This means you can run your RV appliances and systems for longer on a single charge.
- Maintenance-free: Lithium batteries require little to no maintenance, unlike lead-acid batteries, which require regular watering and cleaning. This can save you time and hassle, especially when you’re on the road.
Some things to consider before switchiching your RV battery to lithium:
- Cost: Lithium batteries are more expensive than traditional lead-acid batteries, so you’ll need to weigh the cost against the benefits of longer lifespan and increased efficiency.
- Compatibility: Lithium batteries require a different charging profile than lead-acid batteries, so you’ll need to ensure that your RV’s charging system is compatible with lithium batteries. If your RV chassis charges your house battery you may need a different charger installed.
- Capacity: Lithium batteries generally have a higher capacity than lead-acid batteries, so you’ll need to ensure that your RV’s electrical system can handle the increased power output.
- Size and weight: Lithium batteries are generally smaller and lighter than lead-acid batteries, which can be a benefit in an RV where space and weight are at a premium.
- Safety: While lithium batteries are generally safe, they do require careful handling and charging to prevent overheating and other safety issues.
Overall, lithium batteries offer numerous advantages over lead-acid batteries, making them an excellent choice for RV use. While they are more expensive than lead-acid batteries upfront, their longer lifespan and superior performance make them a worthwhile investment for many RV owners.
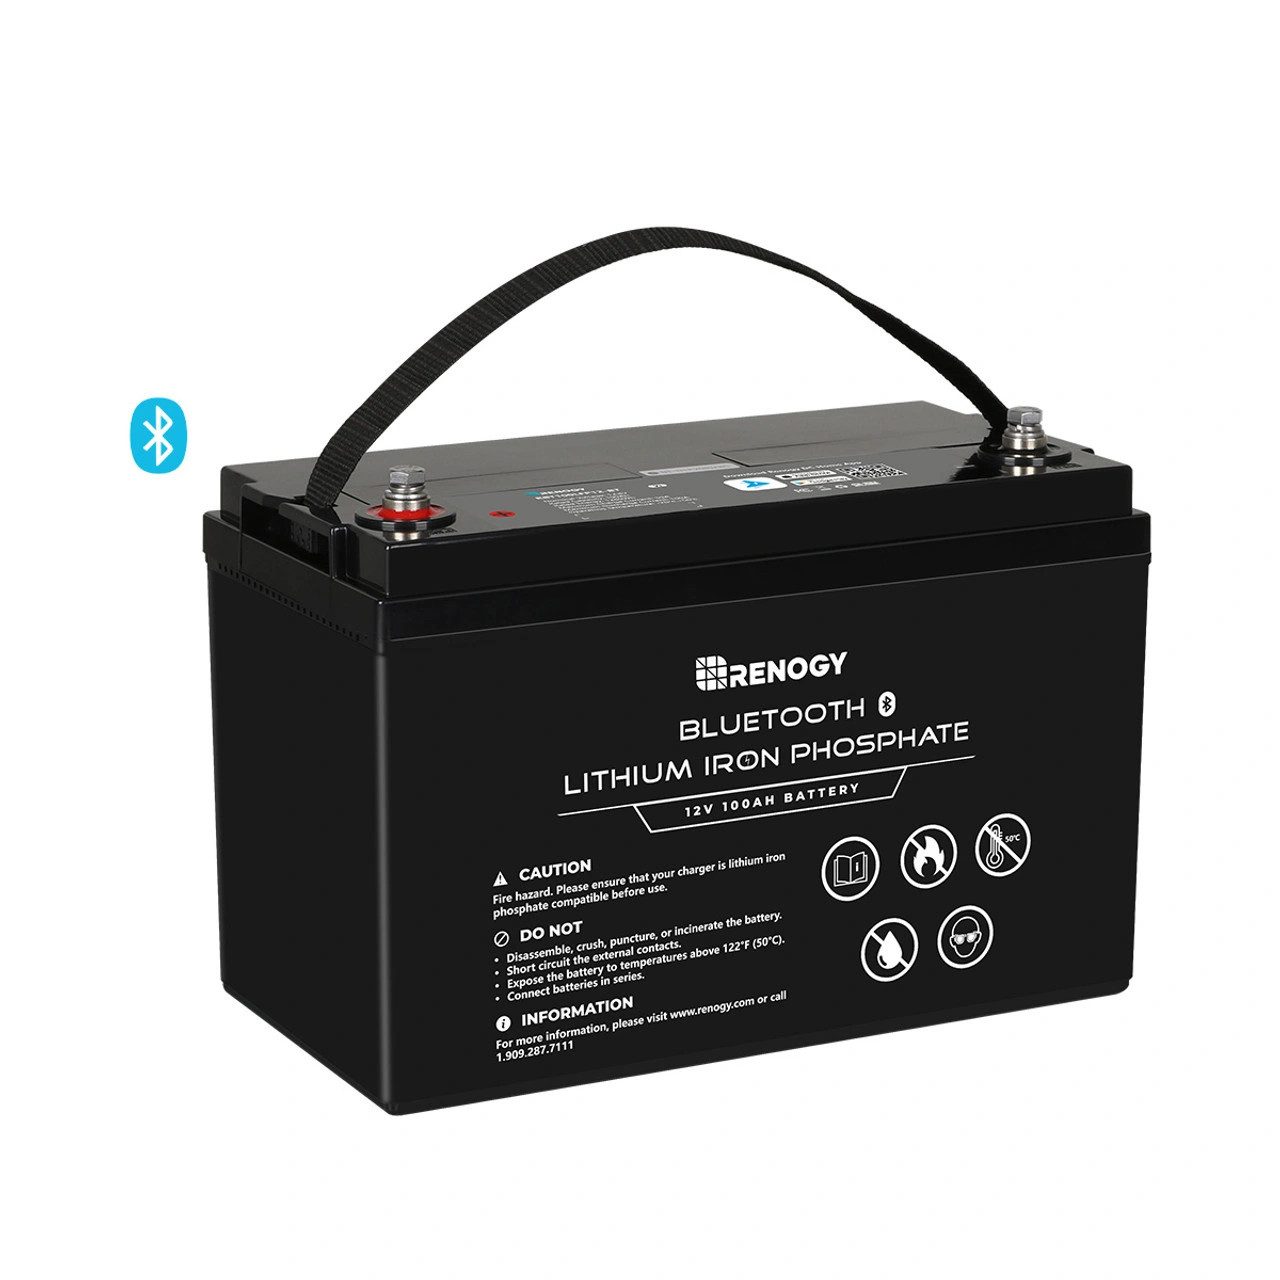
Here’s the lithium battery Renogy sells that is a great price point and get really great reviews. Check the current price by clicking here.
Generators
Portable generators can be a useful electrical source for RVs, especially when you’re camping in remote areas without access to electrical hookups. However, it’s important to choose the right size generator for your needs based on the typical electrical loads you are running.
The size of the generator you need to power your RV’s roof air conditioner will depend on the air conditioner’s capacity and other electrical devices that you’ll be using at the same time. A good rule of thumb is to choose a generator with a capacity of at least 3,000 watts to power a typical rooftop air conditioner. This should provide enough power to run the air conditioner along with other devices such as lights, a TV, and a refrigerator.
When choosing a generator, it’s important to consider factors such as noise level, fuel efficiency, and portability. Some RVers prefer to use inverter generators, which are known for their quiet operation and fuel efficiency. These generators can be more expensive than conventional generators, but they may be worth the investment if you plan to use your generator frequently.
In addition to choosing the right size and type of generator, it’s also important to follow safe operating practices when using a generator with your RV. This includes keeping the generator at a safe distance from your RV to avoid carbon monoxide poisoning, and ensuring that the generator is properly grounded to prevent electrical shock.
RVs with onboard power generators are typically installed in a dedicated compartment on the RV and are designed to provide enough power to run all of the electrical devices in the RV.
When choosing an RV with an onboard generator, it’s important to consider the generator’s capacity, fuel type, and maintenance requirements. The generator’s capacity should be sufficient to power all of the devices you plan to use in your RV, including the air conditioner, refrigerator, and other appliances. Generators that run on propane or diesel fuel can be more fuel-efficient than those that run on gasoline, but they may be more expensive to maintain.
It’s also important to follow safe operating practices when using an onboard generator. This includes ensuring that the generator is properly maintained and serviced, using the correct type of fuel, and operating the generator in a well-ventilated area to avoid carbon monoxide buildup.
Another consideration when choosing an RV with an onboard generator is the noise level. Generators can be quite loud, so it’s important to choose a model that is designed to operate quietly. Some RV manufacturers offer generators that are specifically designed for use in RVs and are engineered to operate with minimal noise.
Electrical System Safety
- Always turn off the power before working on the electrical system: Whenever you need to work on the RV’s electrical system, make sure to turn off the power at the source, whether it’s the generator, battery switch, or campground power pedestal. This will help prevent electrical shocks and other accidents. Many RVs have a battery disconnect switch for safely working on your 12-volt DC current system.
- Use GFCI outlets: Install Ground Fault Circuit Interrupter (GFCI) outlets in your RV to help prevent electrical shock in wet or damp areas, such as the bathroom or kitchen. GFCI outlets detect ground faults and quickly shut off power to the circuit to prevent electrical shock.
- Inspect electrical cords and plugs regularly: Inspect electrical cords and plugs for signs of wear, damage, or overheating regularly. Replace any damaged cords or plugs immediately to avoid electrical fires. Use heavy duty power cords.
- Use surge protectors: Use surge protectors to protect your RV’s electrical system from power surges and voltage spikes, which can damage sensitive electronics and appliances.
- Don’t overload circuits: Avoid overloading circuits by limiting the number of appliances and devices you use at the same time. Overloading circuits can cause electrical fires and damage the RV’s electrical system.
- Follow manufacturer’s instructions: Follow the manufacturer’s instructions for all electrical appliances and devices in your RV, including battery chargers, inverters, and generators. Improper use can damage the equipment and pose a safety hazard.
- Keep a fire extinguisher handy: Always keep a fire extinguisher handy in your RV and make sure you know how to use it. In case of an electrical fire, you can quickly put it out before it spreads.
What is a Voltmeter and Why is it Essential?
A voltmeter is an electrical measuring instrument used to measure voltage or potential difference between two points in an electrical circuit. In an RV context, a voltmeter is an important tool to have in your toolbox as it can be used to measure the voltage of your RV’s battery or electrical system.
Having a voltmeter in your RV toolbox is important because it allows you to quickly and easily diagnose electrical problems in your RV. For example, if you’re experiencing a problem with your RV’s electrical system, a voltmeter can help you determine whether the problem is due to a low battery voltage, a faulty alternator, or a problem with the wiring.
A voltmeter can also be useful for monitoring the health of your RV’s battery. By measuring the voltage of the battery, you can determine whether it is fully charged, partially charged, or depleted. This information can be used to help you plan your power usage and to ensure that your battery is properly maintained.
Extension Cords and Moochdocking
Moochdocking is something RVers use to describe being parked at friends or family and using a standard power cord plug and adapter or dogbone. It’s important to understand an extension cord and adapter to 30 or 50amp doesn’t supply your rig with enough power to use things like your Roof Air Conditioner. Using too much draw can cause major problems and even fire. Consider adding a soft start system to your AC if moochdocking or boonocking, read about soft start here.
Using extension cords for shore power requires some special considerations to ensure safety. Here are some tips to keep in mind:
- Use heavy-duty extension cords: When using an extension cord with your RV, it’s important to use a heavy-duty cord that is designed for outdoor use. Look for cords that are rated for at least 10-15 amps and have a three-pronged plug and receptacle.
- Choose the right length: Using an extension cord that is too long can cause voltage drop, which can lead to electrical problems and potentially damage your RV’s electrical system. Choose an extension cord that is just long enough to reach the outlet you need to use.
- Inspect the cord regularly: Before using an extension cord with your RV, inspect it for any damage or signs of wear, such as frayed wires or cracks in the insulation. If you notice any damage, replace the cord before using it.
- Use a cord reel: Using a cord reel can help keep your extension cord organized and prevent it from getting tangled or damaged.
- Don’t overload the cord: Avoid plugging too many devices or appliances into the same extension cord, as this can overload the cord and cause it to overheat.
- Keep the cord dry: Always keep your extension cord dry and away from water or moisture to avoid electrical shock or damage to your RV’s electrical system.
What is a GFCI?
GFCI outlets, or Ground Fault Circuit Interrupter outlets, are a safety device designed to help prevent electrical shock in wet or damp areas, such as the bathroom or kitchen in an RV.
GFCI outlets work by constantly monitoring the current flow in a circuit. If the current flow is uneven, indicating a ground fault or leakage, the GFCI power outlet will trip and quickly shut off power to the circuit, preventing electrical shock. GFCI outlets are required by the National Electric Code (NEC) in all wet or damp locations in an RV, such as the bathroom or kitchen sink.
In an RV, GFCI outlets can be installed in two ways: as individual outlets or as a GFCI breaker in the main electrical panel. Individual GFCI outlets are installed like regular outlets but have the added safety feature of ground fault protection. GFCI breakers are installed in the main electrical panel and provide ground fault protection to all outlets on the circuit.
It’s important to test GFCI outlets regularly to ensure they are working properly. To test a GFCI outlet, simply press the “test” button on the outlet. This should cause the outlet to trip and shut off power. To reset the outlet, press the “reset” button. If the outlet doesn’t trip when you press the test button or doesn’t reset when you press the reset button, it may be faulty and should be replaced.
Overall, GFCI outlets are an important safety feature in an RV’s electrical system. They can help prevent electrical shock in wet or damp areas and provide added peace of mind for RV owners. These are often the first thing to check when you lose power in your RV.
Basic Troubleshooting for Your RV Electrical System
Here are some basic troubleshooting and regular maintenance for your RV’s electrical system:
- Check the power source: If your RV’s electrical system isn’t working, the first step is to check the power source. If you’re plugged into a campground electrical pedestal, make sure the pedestal is turned on and providing power. If you’re using your generator, make sure it’s running and producing power.
- Power Distribution Panel: Know where your power distribution panel is located. Motorized RVs will often have an Automotive style blade fuse panel for the cab or engine and a second fuse panel for the house area.
- Check the circuit breakers and fuses: If the power source is working properly, the next step is to check the circuit breakers and fuses. Look for any breakers that are tripped or fuses that are blown. If you find a tripped breaker or blown fuse, reset the breaker or replace the fuse.
- Check the batteries: If your RV has a battery system, check the batteries to make sure they are properly charged and connected. Use a voltmeter to check the voltage of the batteries. If the voltage is low, the batteries may need to be charged or replaced.
- Check the wiring: Inspect the wiring in your RV’s electrical system for any signs of damage, such as frayed wires or loose connections. Repair any damaged wiring or connections.
- Check the appliances and devices: If the power source, circuit breakers, fuses, batteries, and wiring are all working properly, the problem may be with an appliance or device in your RV. Check all appliances and devices to make sure they are properly connected and functioning. If you find a faulty appliance or device, repair or replace it.
- Consult a professional: If you’re unable to troubleshoot and fix the problem yourself, it may be time to consult a professional. An RV technician or electrician can help diagnose and repair any electrical problems in your RV.
Understanding your RV’s electrical system makes it so you can help identify and fix common electrical problems in your RV. However, always remember to take proper safety precautions when working on your RV’s electrical system, such as turning off the power at the source and wearing protective gear.
Overloading and Understanding Your RV Electrical Systems
- Understanding Amps: Amps, or amperes, are a measure of electrical current. In an RV’s electrical system, the amps represent the amount of power that can be used at any given time. A 30 amp service system can handle up to 3,600 watts, while a 50 amp system can handle up to 12,000 watts.
- Avoid Overloading: Overloading an RV’s electrical system can cause damage to the system or even start a fire. To avoid overloading, make sure you know the maximum amperage of your RV’s electrical system and never exceed it. This means that you should not use more electrical appliances or devices than the amperage can handle at any given time.
- Prioritize Your Electrical Usage: Prioritize your electrical usage by using only essential appliances and devices. For example, use the air conditioner only when necessary and avoid running multiple high-wattage appliances at the same time.
- Know Your Appliance Wattage: Know the wattage of your appliances and devices to ensure that you’re not using more power than your RV’s electrical system can handle. You can find the wattage information on the label or in the manual of your appliance.
- Consider Upgrading to a 50 Amp System: If you frequently find yourself exceeding the maximum amperage of your RV’s electrical system, consider upgrading to a 50 amp system. A 50 amp system can handle more electrical appliances and devices at the same time, reducing the risk of overloading.
Overloading an RV’s electrical system can be dangerous and cause damage to the system. To avoid overloading, prioritize your electrical usage, know your appliance wattage, and consider upgrading to a 50 amp system if necessary.
Conclusion
When it comes to feeling confident enough to work on your on RV you have to know what you’re working with in order to feel comfortable fixing it. The RVs electrical system can be the most intimidating. Electricity can kill you. Understanding your RV electrical system is crucial for any RV owner. It allows you to safely and efficiently operate your appliances and devices while on the road, ensuring a comfortable and enjoyable travel experience. By knowing the basics of your RV’s electrical system, such as the difference between AC and DC wiring, the types of batteries used, and the importance of safety practices, you can troubleshoot common problems, avoid overloading, and make informed decisions about upgrades or repairs. Remember to always prioritize safety when working with your RV’s electrical system and consult a professional if you’re unsure about any aspect of the system. With a little knowledge and care, you can ensure that your RV’s electrical system is working smoothly and reliably for all your adventures.

