Can You Put a Heated Floor in an RV?

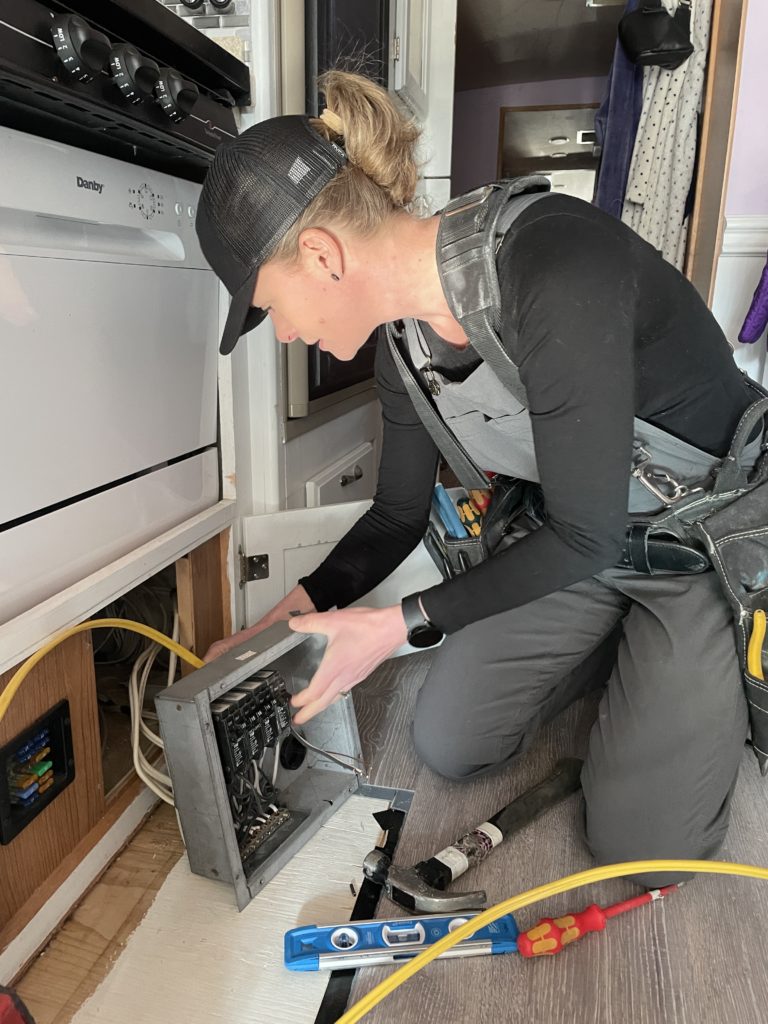
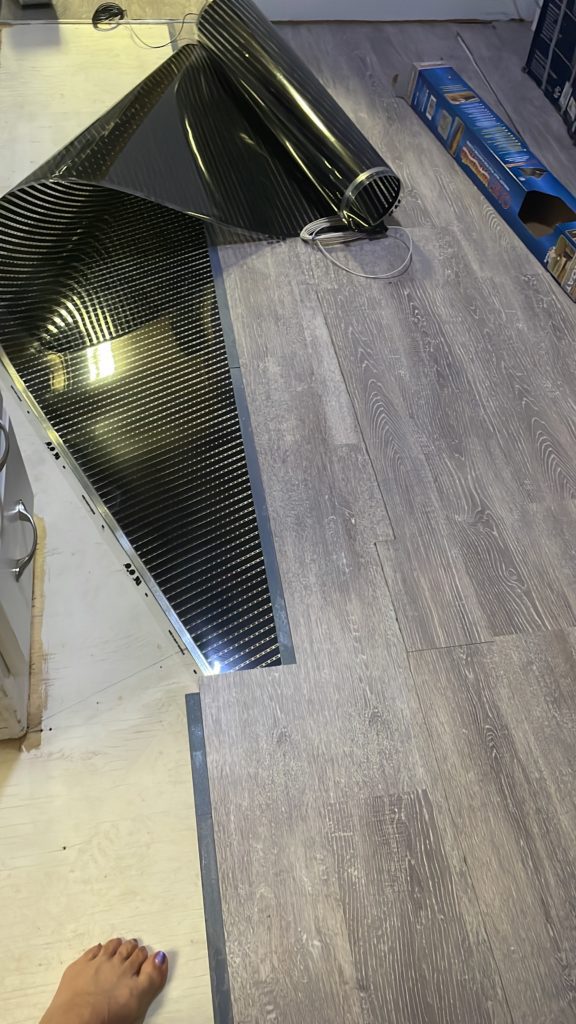
Heck yes, you can! Do you know how I know? I did it! Well, I did 80% of it and then my handy dandy electrician wired it in for me. When I pulled out my disgusting old beige carpet from my 2002 Class A Motorhome and replaced it with Vinyl Plank Flooring I immediately noticed how much colder my rig felt. Luckily it’s pretty easy to pull this type of flooring up. That’s what I did, pulled up the flooring and laid a strip of heated RV flooring underlay underneath it.
Why To Consider Installing Heated Flooring in Your RV
- Comfort: Warm flooring provides a warm and cozy environment in your RV, making it more comfortable to live in during the cold winter months.
- Energy Efficiency: Warm flooring is an energy-efficient way to heat your RV since it uses radiant heat to warm the space. This can result in lower energy bills compared to using a traditional forced air system.
- Improved Air Quality: Unlike forced-air furnaces, which can circulate dust and allergens, heated flooring does not produce any air movement, resulting in better air quality inside your RV.
- Versatility: Heated flooring can be installed in various areas of your RV, such as the kitchen, bathroom, and bedroom, making it a versatile heating solution that can be customized to your needs.
- Increased Resale Value: Installing radiant floor heating can increase the resale value of your camper, as it is a desirable feature that many full-timers look for.
Underfloor Heating: How Does It Work?
Underfloor heating is a type of heating system that uses radiant heating to warm the floor and the surrounding space. It involves installing a heating element underneath the floor surface, which can be powered by electricity or hot water.
Electric underfloor heating systems typically consist of a series of electric heating cables or mats that are installed directly beneath the floor surface. These cables or mats are connected to a thermostat, which controls the temperature of the floor and the surrounding space.
Hot water underfloor heating systems, also known as hydronic, use a series of pipes installed beneath the floor surface to circulate hot water. The hot water is heated by a boiler or heat pump, and a series of valves and pumps are used to control the flow of water and the temperature of the floor. I’m not sure if this will be more added weight than the electric so that is something to consider if you’re stationary versus travelling.
Both electric and hot water underfloor heating systems work by emitting radiant warmth, which warms up the objects in the room, including the floor, walls, and furniture. This creates a more even and comfortable distribution compared to traditional methods that rely on convection, which can create cold spots and hot air pockets.
Underfloor systems are typically more energy-efficient than traditional heating systems, as they require lower temperatures to achieve the same level of comfort. They can also be zoned, which means different areas of the house can be controlled separately, allowing for greater control over temperature and energy usage.
What Types of Underfloor Heating Are Available for Camper Use?
Both electric and hydronic underfloor systems provide an efficient and effective way to warm up your camper interior. The choice of system depends on your preferences and the RV’s design and construction. Electric underfloor heating is generally easier and less expensive to install, while hydronic systems are more energy-efficient and suitable for larger RVs with more complex heating needs.
There are a few brands to choose from on the market right now.
- Warmup: Warmup is another popular brand that offers electric underfloor solutions for RVs, including heating mats and cables.
- Thermosoft: Thermosoft offers both electric and hydronic underfloor heating systems suitable for campers.
- SunTouch: SunTouch provides electric underfloor heating solutions for RVs and offers a range of heating mats and cable systems.
- HeatTech: specializes in electric underfloor systems and offers a range of heating mats and cables suitable for RVs.
- Stepheat: This brand is relatively new to the market but they have a 12v flooring system that is very interesting to me.
- Warmfloor solutions: is the brand that I purchased. I bought this brand on sale through Walmart.
- Nuheat: offers a variety of electric underfloor heating solutions, including mat and cable systems suitable for RVs.
How to Choose Heated RV Floor Underlay
When choosing heated RV flooring underlay, there are a few important factors to consider to ensure that you make the right choice for your needs. Here are some tips to help you choose the best heated camper flooring underlay:
- Material: The material of the underlay is an important factor to consider. Look for a material that is durable, moisture-resistant, and can withstand the high temperatures of the heating system. Some popular materials for heated RV flooring underlay include cork, rubber, and foam.
- Thickness: The thickness of the underlay is also an important factor to consider. A thicker underlay will provide more insulation and help to prevent loss of warmth. However, a thicker underlay may also make it more difficult to install the flooring.
- Compatibility: Make sure that the underlay you choose is compatible with the type of flooring you plan to install. Different types of flooring may require different types of underlay.
- Temperature output: Consider the warmth output of the floor heating you plan to use with the underlay. Make sure that the underlay can handle the output of the temperature and that it will provide enough insulation to keep the warmth in the camper.
- Cost: Finally, consider the cost of the underlay. You don’t want to overspend on an underlay that is more than you need, but you also don’t want to skimp on quality and end up with an underlay that doesn’t perform well. Look for a balance between cost and quality.
How To Install Heated RV Flooring In Your Camper
Don’t make the same mistake I made and decide after you already installed your new flooring to add a cozy warm underlay! Choose the underlay then install your new flooring! It’s important to note that not all underfloor radiant floor heating is designed to work with vinyl. It’s important to do your own research on this, part of why I chose the warm floor brand is it claims to be one of the few that is designed to work under vinyl plank floors. I also chose it because it didn’t require a layer of subfloor I just put it between my plywood subfloor and the floating vinyl plank.
Updated to include the fact that some of the grip strips are expanding when the heat is on, I made the mistake of leaving a towel on the floor in one spot and that could be what caused it, It doesn’t bother me much but wanted to let folks know, it’s also a spot that I had removed and repaired, second use of original glue strips, so this may not happen if you put the underlay down before you lay your flooring. When turned the heat off I put a heavy flat bottom coffee table over the spot that seemed to be bubbling and it’s back to normal as though nothing happened.
- Choose the flooring material: Choose the type of flooring you want to install in your camper. Popular options include vinyl, laminate, and hardwood flooring.
- Choose the underlayment: Choose the heated flooring underlayment that is compatible with the type of flooring you have chosen.
- Clean the floor: Remove any old flooring and clean the floor thoroughly. Make sure the surface is level and free of debris.
- Install the underlayment: Lay the underlayment down on the floor, ensuring that it is flat and smooth. Cut the underlayment to size, leaving extra material around the edges.
- Lay the flooring: Lay the flooring on top of the underlayment, starting at one corner of the room. Continue laying the flooring, ensuring that it is straight and level. Cut the flooring to fit around any obstacles.
- Install the heating system: Follow the manufacturer’s instructions to install the floor heating. This may involve installing heating mats, wires or pipes underneath the flooring.
- It’s important to have a dedicate breaker for the flooring.
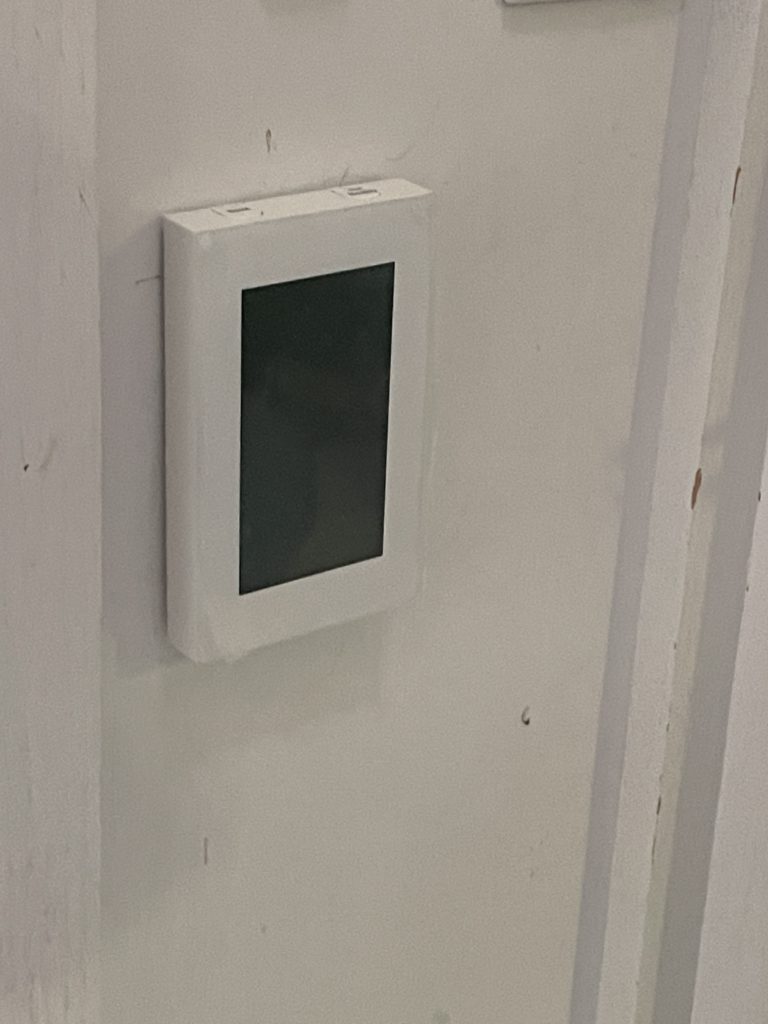
- Connect the system: Connect the system to a thermostat or control panel. This will allow you to regulate the temperature of the heating system. I recommend hiring an electrician for this part of the installation.
- Finish the installation: Finish the installation by trimming the edges of the flooring and adding any finishing touches, such as baseboards or molding.
Tools and Materials You’ll Need for Installing Heated Flooring
Installing heated RV flooring can be a bit more involved than installing regular flooring, so it’s important to have the right tools and materials on hand. Check out my blog post The best vinyl flooring for your RV. Here’s a list of tools and materials you’ll need for installing heated flooring:
Tools:
- Measuring tape
- Utility knife
- Trowel
- Notched trowel
- Scissors
- Rubber mallet
- Jigsaw or circular saw
- Hammer
- Pliers
- Screwdriver
- Level
- Drill
- Staple gun
- Knee pads
Materials:
- Heated flooring system (mats, wires, or pipes)
- Underlayment material (cork, foam, or rubber)
- Flooring material (laminate, hardwood, or tile)
- Adhesive (if required by the flooring material)
- Transition strips or molding
- Insulation material (if necessary)
- Screws or nails (if necessary)
- Thermostat or control panel for the heating system
- Electrical wire (if necessary)
It’s important to ensure that you have all of the necessary tools and materials before starting the installation process to avoid delays and ensure a successful installation. Additionally, make sure to follow the manufacturer’s instructions for both the flooring and the heating system to ensure proper installation and performance.
Preparing Your RV’s Floor for Heated Flooring Installation
Preparing your RV’s floor is an important step in installing floor heating. It’s important to read and follow the manufacturer’s directions regarding installing the flooring. Here are the steps to follow to prepare your camper floor for heated flooring installation:
- Remove old flooring: Remove any old flooring material from the RV’s floor. This may involve using a scraper, pliers, or other tools to pry up the old flooring. Check out my blog post about installing new flooring in your RV.
- Clean the floor: Thoroughly clean the RV’s floor to remove any dirt, dust, or debris. Sweep or vacuum the floor to remove loose particles, and then use a damp mop to clean the floor. Allow the floor to dry completely before moving on to the next step.
- Inspect the subfloor: Check the subfloor for any damage or unevenness. Replace any damaged sections of the subfloor, and use a levelling compound to level out any uneven areas.
- Install insulation: If your RV does not have proper insulation, you may need to install insulation before installing floor heating. This will help to improve the energy efficiency of your RV and prevent heat loss.
- Lay the underlayment: Lay the underlayment material on top of the subfloor. The underlayment will provide a smooth surface for the heated flooring to rest on and help to prevent loss of warmth. Make sure that the underlayment material is compatible with your chosen heated flooring system.
- Install the system: Follow the manufacturer’s instructions to install the heating system. This may involve installing heating mats, wires or pipes underneath the flooring.
- Connect the system: Connect the radiant floor heating to a thermostat or control panel. This will allow you to regulate the temperature of the heating system. I highly recommend hiring a licensed electrician for the proper connection if you’re not experienced in working with electrical systems.
Some Pictures of my heated flooring installation


Tips for Troubleshooting and Maintaining Your Heated Flooring
- Keep the floor clean: Regularly clean your heated flooring to remove dirt and debris. Use a broom or vacuum to remove loose particles, and then use a damp mop to clean the floor. Avoid using harsh cleaners or abrasives that could damage the flooring or heating system.
- Check the thermostat: If you’re experiencing issues with the floor heating, the thermostat may be the problem. Check to make sure that the thermostat is set to the correct temperature and that it is functioning properly. If necessary, replace the thermostat.
- Check the wiring: If the heating system is not working, check the wiring to make sure that all connections are secure and that there are no frayed or damaged wires. If you’re not comfortable working with electrical wiring, contact a professional for assistance.
- Check for air leaks: Air leaks can cause the heated flooring to lose heat and reduce its efficiency. Check for any air leaks around windows, doors, or other openings in the home, and seal them with caulking or weatherstripping.
- Schedule regular maintenance: Regular maintenance can help to prevent issues with your heated flooring. Schedule annual maintenance with a professional to inspect the system, check the wiring, and make any necessary repairs.
- Use rugs or mats: To prevent damage to the heated flooring, use rugs or mats in high-traffic areas or areas where spills are likely. This can help to protect the flooring and extend its lifespan.
- Follow manufacturer’s instructions: Make sure to follow the manufacturer’s instructions for both the flooring and the heating system to ensure proper installation and performance.
Enjoying the Benefits of Heated Flooring in Your RV: Year-Round Comfort
Adding heated RV flooring to your rig is a great way to enjoy year-round comfort during your travels. Not only does it provide warmth and comfort, but it can also help to protect your RV’s flooring from damage caused by cold temperatures. By following the installation and maintenance tips outlined in this article, you can enjoy the benefits of heated flooring in your RV for years to come. So, whether you’re planning a winter adventure or just want to stay comfortable during chilly nights, consider adding heated flooring to your RV for a cozy and comfortable travel experience.
Check out some of my other popular blog posts:
The best vinyl flooring for your RV.


