Magnetic Sprinter Van Bug Screen: My Installation Story and Review
Living off-grid in warmer climates like Mexico has its perks, but it also comes with its own set of practical challenges. One of these is managing the balance between staying cool and keeping out unwanted insects. My 2006 Pleasureway swas designed very well, with screens on most windows, but as any Van Life can attest to, the best flow comes from the huge rear and side doors. The bug situation in Mexico isn’t the thing you remember most about your trip, but let me remind you, a pleasant camping experience particularly if you’re boondocking, comes from keeping out the flies and letting the air flow.
Let the research begin, if you have ordered anything from Amazon while you’re travelling, you will be well aware of the fact that shipping can be challenging. The search parameters for me included a shipping time line that would fit into my one month stay at an RV park. It also had to be the right size of course. It’s important to measure accurately, particularly if you’re paying extra for a shipping service and you won’t be able to take advantage of the return policy that Amazon is so famous for.
There are some models that appear to mount on the outside of the door, but that type of system didn’t really appeal to me. Something designed to nestle inside the door frame to allow the door to be closed whenever needed was important to me. My 2006 pleasureway is an older model that there aren’t a lot of accessories for these days. Hours of research goes into every purchase as well as the usual finger crossing and hoping for the best.
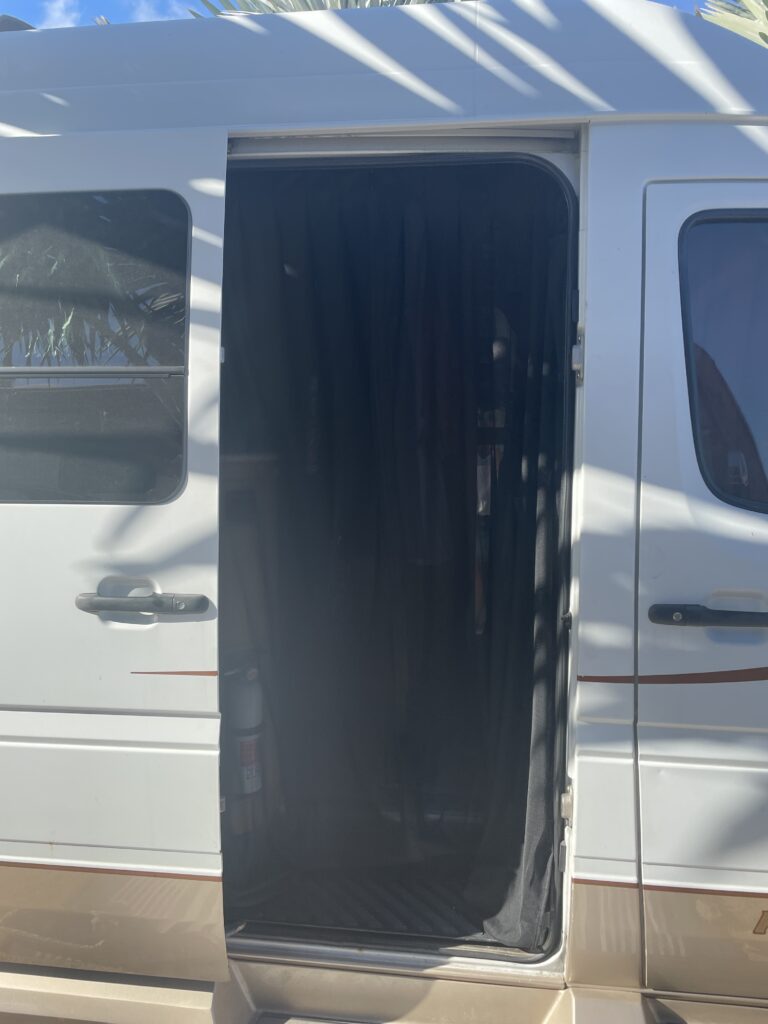
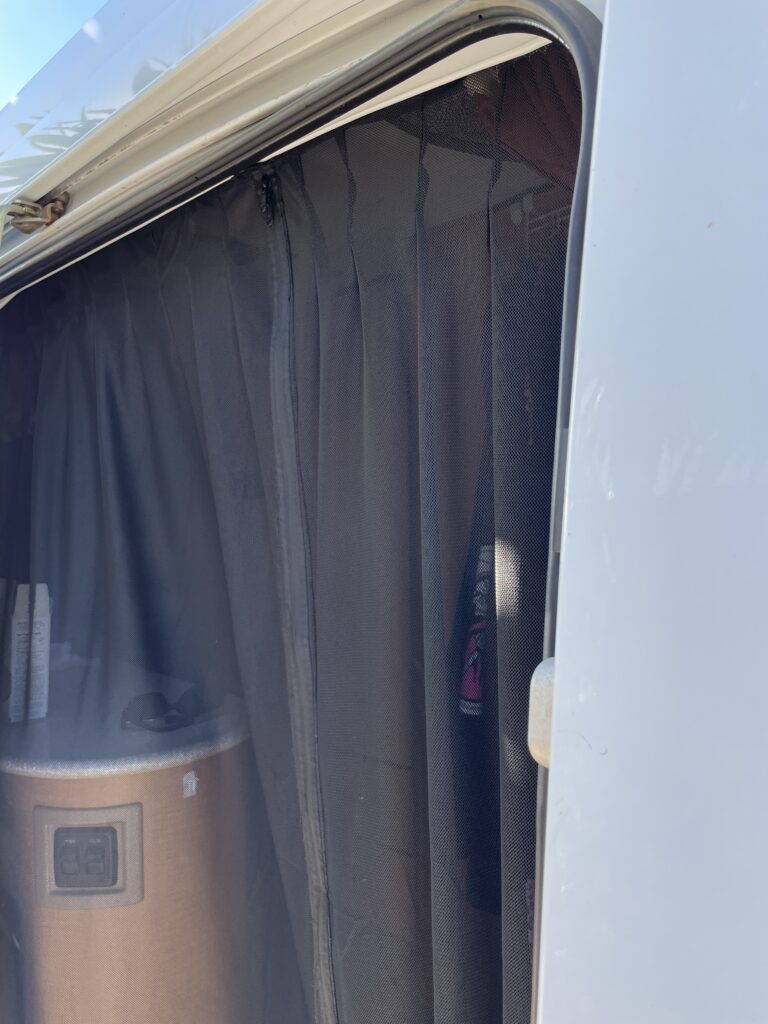
The one I chose was the VANRITE Sprinter Bug Screen Outdoor Vanlife Ram Promaster Camping Mosquito Screen. Although it is clearly designed for a different unit, it was the only one I found that would fit my sliding side door with a bit of overhang. Forgive me for this image that shows the rear mount image of this Sprinter Van Bug screen.
The delivery was actually a few days faster than expected, it arrived in my destination before I did, but that’s another story for another time. It came beautifully packaged with a carrying case that you see in the image above. It came with extra magnets to help install it with a perfect fit. I am 100% happy with the shipping and packaging. It appears to be very well made, but that is something that only the test of time will reveal.
So, let’s get into it – my installation story and review of the magnetic Sprinter Van bug screen, a tale of necessity, ingenuity, and the pursuit of a bug-free, breezy RV life.
Section 2: The Challenge with Magnets
When it comes to magnetic bug screens, one key factor that can’t be overlooked is the strength of the magnets themselves. This aspect became particularly evident with the chosen for my Sprinter van. The screen’s magnets, while functional, weren’t as strong as I had hoped. This was a crucial point, as the effectiveness of a magnetic bug screen hinges on its ability to stay put particulary with dogs and humans going in and out all day long(check out our related post about repelling rodents).
There is also a distinct possibilitiy that if this bug screen fit my door frame a bit more perfectly the magnets would be in better postion to stay put. In all honesty it was obvious out of the package that the magnets weren’t very strong and a strong velcro for the top edge might be a good idea. Installing the extra magnets also probably would have helped with this situation. It became obvious to me within a few days of usage that i was going to want a permanent mounting systme anyway.
This particular brand of bug screen utilizes a three way zipper closure. The expectation had been that the magnets would hold the screen in place but also, like most other magnetic bug screens, be used to open and close the screen. In hind sight, because the magnets holding the screen in place aren’t overly strong magnets, barging in and out through a magnetic closure wouldn’t have worked out at all. The minor inconvenience of a zipper is somewhat diminished by the fact that i don’t have flies or mosquitos in my van right now.
Being the type of camper that is in and out of their van all day long, often accompanied by my own two dogs, one of which I have to carry in and out because she’s too old to jump in and out of the van on her own. Often carrying cups, plates, computers, and other random items. The prospect of figuring out how to one handed open the zipper every time was a challenged I needed to tackle.

This approach, while a bit of a workaround, proved to be an effective solution to the magnet strength issue. It ensured that my investment wasn’t wasted and that my van’s living space remained comfortable and bug-free.
Section 3: My Installation Process
Installing the magnetic Sprinter van bug screen was a straightforward process,. There were actually no installation instructions included becasue it’s pretty easy to figure out how it works. For my own workaround only a small amount of creativity was required. Creativity and a Robertson screwdriver. Here’s a step-by-step guide:
- Unpack and Lay Out the Screen: Start by unpacking the screen and laying it out flat. This helps in understanding its dimensions and how it will fit your door. Don’t make the mistake I did, and put it in backwards with the more attractive finished side facing inside the van.
- Position the Screen: Hold the screen up to the door to determine the best placement. Ensure it covers the entire opening. Initially, the zipper opening hung too low so when It was installed permanently i adjusted the opening to be a bit higher up for ease of entry and exit. I actually now leave the zipper closed and enter through the side closest to the passenger seat. There are now more magnets there so the door is easy to open and close with one hand.
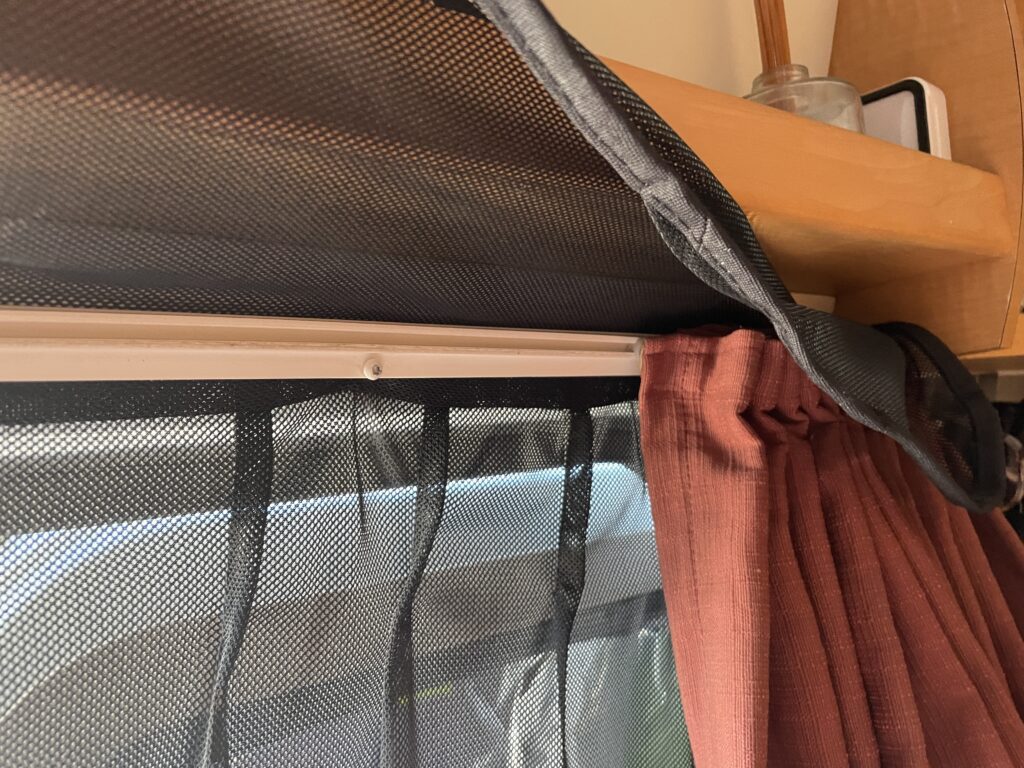
- Securing Under the Door Curtain: I slid the top edge of the screen underneath the existing van door curtain and used the original screws to secure it in place. This provided extra stability and ensured a snug fit.
- Fitting Under the Trim Piece: Next, Simply unscrewing the mounting scews and sliding the screen between the trim and the screw allows for an easy-to-adjust mounting system.
- Tools and Materials Needed: Basic tools like a flat-head screwdriver (for prying open the trim) and perhaps some adhesive strips or Velcro for additional might work best in other situations. Velcro would have been the go to solution in my situation if there weren’t already screws in place to utilize.


Section 4: Post-Installation Review
After installing the screen, I noticed immediate improvements:
- Ease of Use: The screen now closes more reliably, thanks to the extra support. Adusting it to one sid is a major imporvment
- Effectiveness: It does a great job keeping bugs out, even during excessive high wind days and multiple in and outs from dogs of varrying sizes and coordination.
- Ventilation and Light: There’s significantly better airflow!
Unexpected Drawback: The screen does darken the interior slightly, but it’s a small price for bug-free air.
Unexpected Bonus: Even with the door wide open I have a bit of extra privacy inside.
Section 5: Final Thoughts and Recommendations
I would wholeheartedly recommend this magnetic sprinter van bug screen to any fellow Sprinter van owner, particularly those who often find themselves in areas where bugs are a common nuisance. The comfort and convenience it brings, especially in warm, bug-prone environments, cannot be overstated. It effectively turns your van into a sanctuary, free from the annoyance of buzzing insects, while still allowing you to enjoy the natural airflow and views.
For those with different van models, the key is to ensure proper measurement before making a purchase. It’s crucial that the screen fits snugly within your door frame to maximize its effectiveness. Also, consider how the screen attaches to your specific van model. My experience with adapting the screen to my van involved a bit of creativity, so be prepared to think outside the box. Look for a screen that can be modified to work with your van’s unique structure and design features, such as the door curtain or trim pieces.
As for my own opinion this is the best bug screen for sprinter van life . The ease of installation, combined with its effectiveness, has made my van life experience significantly more comfortable. It’s a simple upgrade, yet it has a profound impact on the day-to-day living experience inside the van. Given its utility and the improvement it has brought to my life on the road, I plan to keep this screen as a permanent fixture in my van. It’s not just about keeping the bugs out; it’s about enhancing the overall quality of my living space, making my van feel more like a home, even when I’m miles away from civilization.


