Grip Strip Flooring For Your RV Camper

please note there may be affiliate links on this blog post. This is the only way this blog makes any money to pay for my time and the fees associated with having a web page. It means a lot if you use the links and it doesn’t cost you an extra penny!
Why I decided to replace my RV carpet with vinyl grip strip flooring
The decision to undertake a major project like replacing the floor in your RV can be quite daunting. It took me a few years to work up the courage to begin the process of replacing the disgusting carpet in my Class A RV and put down grip strip vinyl planks. In the first RV I lived in I made absolutely no changes…zero, nothing! Many people will tell you that making these changes will affect your resale value, and this is quite possible. For every person who wouldn’t buy a renovated RV there are two more who would love to buy something that has been upgraded and beautified. I would have much rather purchased my RV with the new flooring already put in, but in 2002 there weren’t many motorhomes with anything other than carpet.
Choosing the perfect vinyl grip strip flooring for my RV
I researched for months before I decided to go with the luxury vinyl plank in hewn oak. I must have gone into the store at least 12 times trying to find the right color and price for the flooring I was going to use. I must have read a million reviews of the grip strip and why some folks loved it and some folks hated it. I am a full time RVer in Canada. I have been spending my summers in a really warm spot and my winters have been pretty darn cold. These fluctuations were a cause for concern for me, many of the reviews I read said that the fluctuations would cause the planks to separate.
This just hasn’t been the case for me. Granted I do live in it full time so I try to keep the temperatures at least comfortable but I have left it unattended in very warm weather and very cold weather. Still I haven’t had the separation people complained about.
I based my decision on the price and the fact that I felt confident I could do the project myself. I liked that no underfloor preparation was required in my case. My carpet had a very solid piece of wood planking beneath it. I wanted to be sure that the flooring I chose could be repaired if needed, I just have a tendency to ruin things sometimes. I liked the flexibility afforded by the grip strip I felt like it would be able to stand up to the flexing and movement of my RV. So far, I haven’t been wrong!
Removing the old carpet and preparing the subfloor for installation
Removing the carpet from an RV you are living in full-time can be a huge challenge. The furniture in most RVs is attached to the floor. You have to decide if you are going to work around your built-ins or removed them and reinstall them. I personally would recommend removing them and installing the flooring underneath properly. But that’s a you decision! For resale value, I fully believe you should do the entire floor. That being said I left the carpet under my captains’ chairs and over the dog house in the cabin of my Class A. I put a trim piece between the two sections and I don’t hate it at all.
I also left the carpet in my bedroom. I wanted to keep some of the extra warmth carpets provide. I also had zero intention of lifting up my bed and replacing the flooring underneath it.
I removed and sold my dinette and couch. I’m still not 100% happy with what I have replaced them with, but I’m 100% happier with what I have compared to the ugly old couch and dinette! Here’s some Before and after pictures. I am obviously a big purple fan! I know it’s not for everyone. Don’t judge it makes me happy so I did it I absolutely love the look of grip strip flooring for your rv camper renovations.
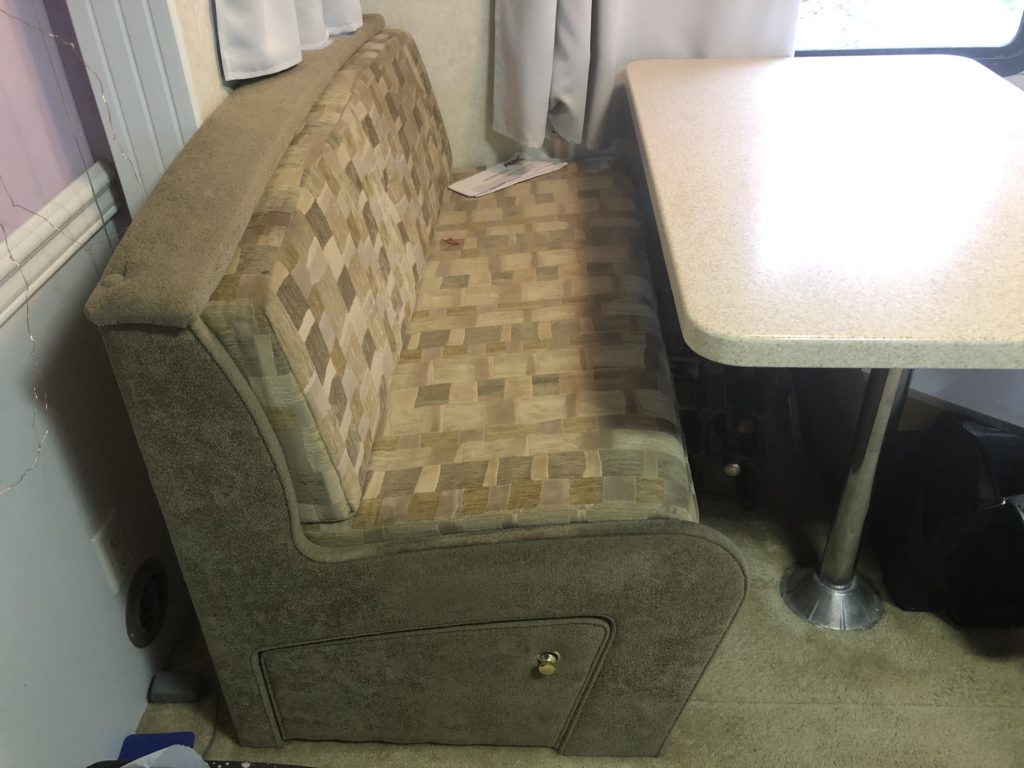
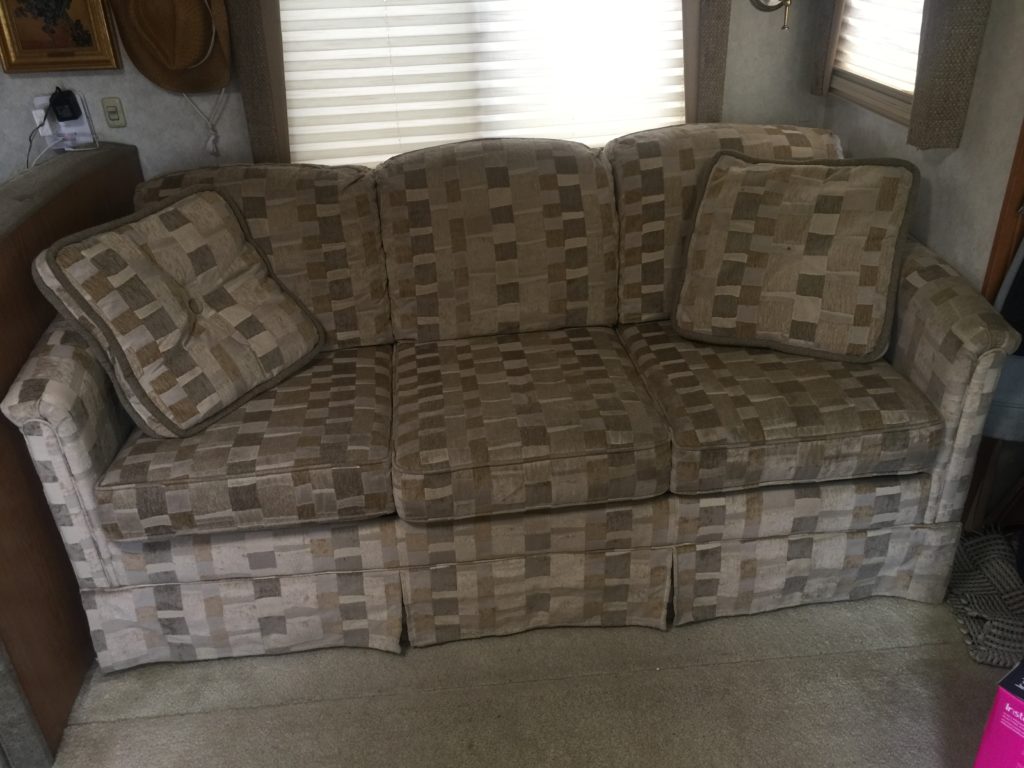
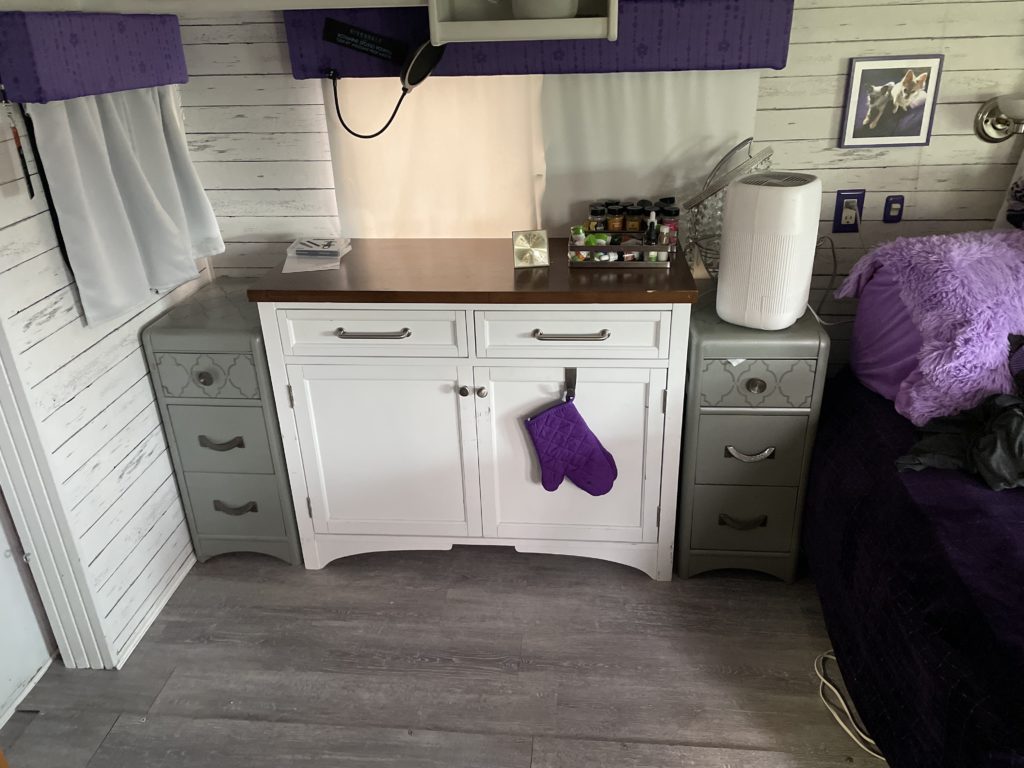
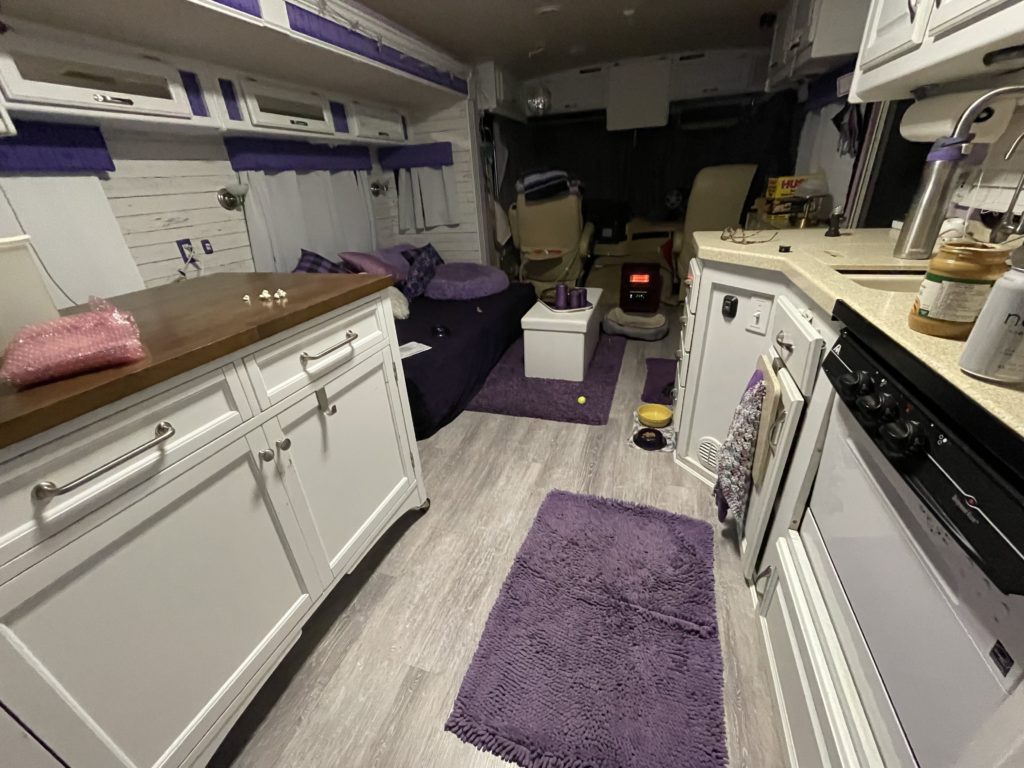
My only complaint about ripping out the carpet myself is that I didn’t have the right tools when I started the job. It is a really big time-consuming job! It was messy and painful and really really dirty! My RV is a 2002 so I was looking at 20 years of carpet crud layers and layers. Sand, so much sand!! I didn’t realize there would be that much sand! I recommend reading this post when you’re done, it has a really great shopping list at the bottom! Here is the tools I for sure didn’t have in my tool box that I wished I did!
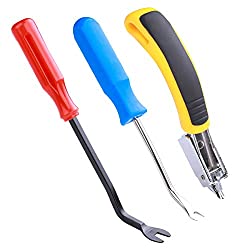
I recommend taking your time. Make sure you have a shop vac and a lot of those contractor-thick garbage bags. I’ll make a list at the end of the things you will need for this project. I definitely recommend protective eyewear and an N95 or better mask. If your rig is as old as mine is you are going to experience some flying debris and carpet fibres aren’t great to inhale.
Don’t feel discouraged though, when It’s all said and done it wasn’t that hard, just labour-intensive and messy! My hands were pretty sore for a day or two. Here’s a really informative YouTube video showing the process. Not my video, just one I found that is relevant! These folks used the same grip strip flooring for your RV camper I used!
Step by step guide for removing carpet from your RV
- Start by clearing out any furniture, appliances, and other items that may be obstructing the carpet. Remove everything from the RV to create a clear workspace.
- Begin by cutting the carpet into manageable sections. This will make it easier to handle and dispose of. Use a utility knife or carpet cutter to cut the carpet into strips that are about 2 to 3 feet wide.
- Once you have the carpet cut into strips, begin pulling up the sections by hand. Start at one end of the RV and work your way to the other end. If the carpet is glued down, you may need to use a scraper to loosen it from the subfloor.
- If the carpet is difficult to remove, you may need to cut it into smaller sections. Use the utility knife or carpet cutter to cut the strips into smaller pieces that are easier to handle.
- Once you have removed all of the carpet, use a scraper to remove any remaining adhesive or glue from the subfloor. Be careful not to damage the subfloor in the process. Check thoroughly for staples they will damage your new vinyl flooring.
- Vacuum the subfloor thoroughly to remove any remaining debris or dust.
Installing the vinyl grip strip flooring for your RV camper: Step-by-step guide
- Prepare the surface: Remove any existing flooring and thoroughly clean the subfloor. Make sure it is dry, flat, and free of any debris or protruding nails. Once you have your old flooring removed. You are going to want to do a thorough search for any wayward staples or water damage. Now is the best time to deal with any issues your old flooring was hiding. I painted my entire subfloor with Killz primer just to help prevent any future water damage and help protect my pretty new flooring. (This Is probably quite a bit cheaper from your local hardware store
- Measure and plan: Measure the dimensions of your RV’s floor and plan the layout of the grip strip flooring for your rv camper. Keep in mind that you may need to cut some of the planks to fit around corners or obstacles. I ended up with a few extra boxes of flooring. I melted the floor and have used a few of these extra pieces already.
- Acclimate the flooring: Grip strip flooring should be acclimated to the RV’s environment for at least 48 hours before installation. Place the boxes of flooring in the RV and leave them there, with the temperature set to the same as the installation environment.
- Install the first row: Start in one corner of the RV and lay the first row of grip strip flooring with the grip strips facing the wall. Leave a 1/4-inch gap between the wall and the flooring for expansion. If I were to do it over again, I would have started at the kitchen cupboards, they were really challenging to cut around and fit in with the already laid flooring.
- Install subsequent rows: Install the subsequent rows by locking the grip strips into the previously installed row. Use a tapping block and hammer to ensure the planks are tightly locked together.
- Cut planks: When you come to the end of a row, measure and cut a plank to fit. Use a utility knife and straight edge to make the cut. These flooring pieces will cut quite easily if you ‘score’ them first with a utility knife. Be aware the grooves in the flooring can make your knife not follow your straight edge.
- Fit around obstacles: If you need to fit the flooring around obstacles like cabinets or appliances, measure and cut the planks accordingly. Be sure to leave a 1/4-inch gap for expansion.
- Complete the installation: Continue installing rows of grip strip flooring until the entire RV floor is covered. Use a roller to press down the planks and ensure they are securely in place.
- Install trim: Install baseboards or trim to cover the expansion gap between the flooring and the walls.
- Enjoy your new floor: Congratulations, your new grip strip flooring is installed! You can now enjoy your RV’s updated look and improved functionality.
I used both a hand roller and I rented the 100Lb roller from Home depot when I installed grip strip flooring for your rv camper. Here are what they look like. The hand roller I still have and have used for my floor repair job I mentioned.


Benefits of vinyl grip strip flooring for your RV
Grip strip flooring, also known as luxury vinyl plank flooring, has several benefits that make it a popular choice for flooring in RVs and other spaces. Here are some of the benefits of grip strip flooring and why someone might choose it over other types of vinyl flooring:
- Easy to install: Grip strip flooring is designed for easy installation, as it features interlocking planks that snap together without the need for glue or nails. This makes it a great option for DIYers who want to save money on installation costs.
- Durability: Grip strip flooring is highly durable and resistant to scratches, stains, and water damage. This makes it an ideal choice for high-traffic areas like RVs and homes with children and pets.
- Easy maintenance: Unlike hardwood floors, which require regular waxing and polishing, grip strip flooring is easy to maintain. It can be swept, vacuumed, and mopped with mild soap and water.
- Versatility: Grip strip flooring is available in a wide range of colors and patterns, so you can choose the style that best suits your RV’s interior design.
- Cost-effective: Compared to hardwood or tile flooring, grip strip flooring is a more cost-effective option, making it an excellent choice for those on a budget.
- Comfort: Grip strip flooring is softer underfoot than hardwood or tile, making it a more comfortable option for standing or walking on for long periods of time.
Overall, the benefits of grip strip flooring make it a great option for RV owners and homeowners alike. Its ease of installation, durability, low maintenance, and cost-effectiveness make it an excellent choice for those looking for a high-quality flooring solution that looks great and lasts for years to come.
Maintaining your new vinyl grip strip flooring: Tips and tricks
Maintaining grip strip vinyl plank flooring is relatively easy and requires minimal effort. Here are some tips and tricks for keeping your grip strip flooring looking great:
- Regularly sweep or vacuum the floor to remove dirt and debris that can scratch or dull the surface of the flooring.
- Wipe up spills and stains as soon as possible to prevent them from setting into the floor. Use a damp cloth or mop with a mild cleaning solution to clean up spills and stains.
- Avoid using harsh chemicals, abrasive cleaners, or steam cleaners on the flooring, as they can damage the surface of the flooring.
- Use felt pads on the bottom of furniture legs to prevent scratches or damage to the flooring.
- Place doormats at the entrance of the RV to prevent dirt, debris, and moisture from being tracked onto the flooring.
- When moving heavy objects or furniture, lift them instead of dragging them across the flooring to prevent scratches and damage.
- Avoid exposing the flooring to direct sunlight for extended periods of time, as it can cause the color to fade or discolor.
- Use a non-abrasive floor cleaner specifically designed for vinyl flooring to keep your grip strip flooring clean and looking like new. I’m actually a big fan of using steam to clean and I recently had the opportunity to try the Bissell Steam Cleaner and I loved the job that it did with no chemicals or streaking!
- Make sure your slides will flow freely over the flooring. There are some items you can buy if your slide is riding directly over the surface of your new flooring. Some folks will put area rugs under the slide to make sure it doesn’t scratch. Slide systems are all build a little differently. Mine completely clears the floor and I have not needed to make any adjustments. I do make sure the floor is clean before sliding the slides in. Here are some slide floor savers.

RV vinyl grip strip flooring: Frequently asked questions and answers
I hope I have answered all of your questions. I know when I initally started researching what flooring to buy I came across some negative reviews about the Luxury Vinyl Plank Grip Strip Flooring. Now that I have done it myself, completely without help, I’d say I’m very happy with it. Repairing an issue I had was no problem. I was able to slide a heated floor underlay and I’m in love in love with the new warmth in the main living area. Read my blong post about it here.
- Is LVP a good choice for RV flooring?
Yes, LVP is a great choice for RV flooring because it is durable, water-resistant, easy to clean, and has a realistic look and feel of natural hardwood flooring.
- Can LVP be installed over existing flooring?
Yes, in most cases, LVP can be installed over existing flooring in an RV. However, it is important to ensure that the existing flooring is clean, dry, and free of any damage or defects that could affect the installation of the LVP.
- How is LVP installed in an RV?
LVP is typically installed as a floating floor, which means it is not glued down to the subfloor. The planks interlock with each other, and the weight of the flooring holds it in place. The installation process is relatively easy and can be done by a DIYer with some basic tools and knowledge.
- Can LVP be used in all areas of an RV?
LVP can be used in most areas of an RV, including the living room, kitchen, and bathroom. However, it is not recommended for use in areas that are exposed to extreme heat or direct sunlight, such as near a stove or oven or in areas with large windows.
- Is LVP resistant to moisture and spills?
Yes, LVP is water-resistant and can withstand spills and moisture without damage. However, it is important to clean up spills promptly to prevent moisture from seeping into the seams between the planks and causing damage to the subfloor.
- Can LVP be damaged by pet claws?
LVP is highly resistant to scratches and scuffs, but it is not completely scratch-proof. Pet claws can scratch the surface of the flooring over time, so it is important to keep pets’ nails trimmed and use rugs or mats in high-traffic areas to prevent scratches.
- Can LVP be repaired if damaged?
Yes, LVP can be repaired if damaged. Depending on the extent of the damage, a damaged plank can be removed and replaced with a new one, or the damaged area can be patched and repaired using filler and touch-up paint.
These are some common FAQs about using luxury vinyl plank in an RV. If you have any further questions or concerns about using LVP in your RV, it is best to consult with a flooring professional or RV specialist.
Final thoughts and conclusion on replacing your RV carpet with vinyl grip strip flooring
It’s true what they say that the vinyl floor is quite a bit colder than the carpet. A LOT COLDER. I highly recommend doing the heated underlay while you are doing this project. Tearing out the carpet was the hardest part and working around the kitchen angles. All in all easy enough to do on your own. Make sure you follow the instructions and give yourself enough time to go slowly for the challenging parts. If I could do it by myself any one can. I absolutely love the look of the floor and it’s so much easier to keep clean.
Recommended shopping list:
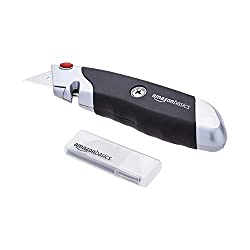
Utility Knife or Carpet Knife: You’ll need a sharp knife to cut the carpet or old flooring into manageable pieces for removal.


Pry Bar: You’ll need a pry bar to help lift up the old carpet or flooring.

Painters Tool: I have found this really handy for my flooring repair project and many other projects around the RV

Staple Remover and Puller: This is the tool kit I waited to buy! Don’t wait, but this before you start pulling your old flooring out!!!

Pliers: You WILL need pliers to remove staples or other fasteners that are holding the carpet or flooring in place. The angled style are also very helpful.


Hammer: A hammer may be useful to help pry up stubborn sections of carpet or flooring.

Vacuum: A vacuum will be helpful to clean up any debris or dust that is left behind after removing the old flooring. I prefer this little wet/dry shop vac, it’s always handy and keeps me from ruining my household vacuum.

Gloves: You will want to wear gloves to protect your hands while removing the old flooring. My hands were covered in little cuts from pulling the million staples.

Safety Glasses: It’s always a good idea to wear safety glasses to protect your eyes from flying debris. There is a lot of dust and crumbs living in those old carpets! safety first friends. Safety first

Knee Pads: If you’re working on your knees for an extended period of time, knee pads can help protect your knees from discomfort or injury. If you were looking for something to do with your old yoga mat, here’s your upcycle!

Respirator Mask: If the old flooring is particularly dusty or contains mold, a respirator mask can help protect you from breathing in harmful particles. If you have an N95 mask lying around that will also help!

Brad Nailer: When you install your trim you are probably going to need one of these. I like the 18v series of power tools from Ryobi. Cordless is always best in my life.

Roller: This will help you ensure the floor grip strips actually grip! You can rent the big one from home depot.


